7.4. Setup EBICS at PostFinance test platform#
In this tutorial, we will set up one EBICS 3 account at the PostFinance
test platform, in order to test the postfinance dialect from libeufin-nexus.
The first requirement is to create one account there. It is advised to set the language as English, as this tutorial is meant for the international audience.
Set the language in the drop-down menu and navigate to the registration section as it is shown below:
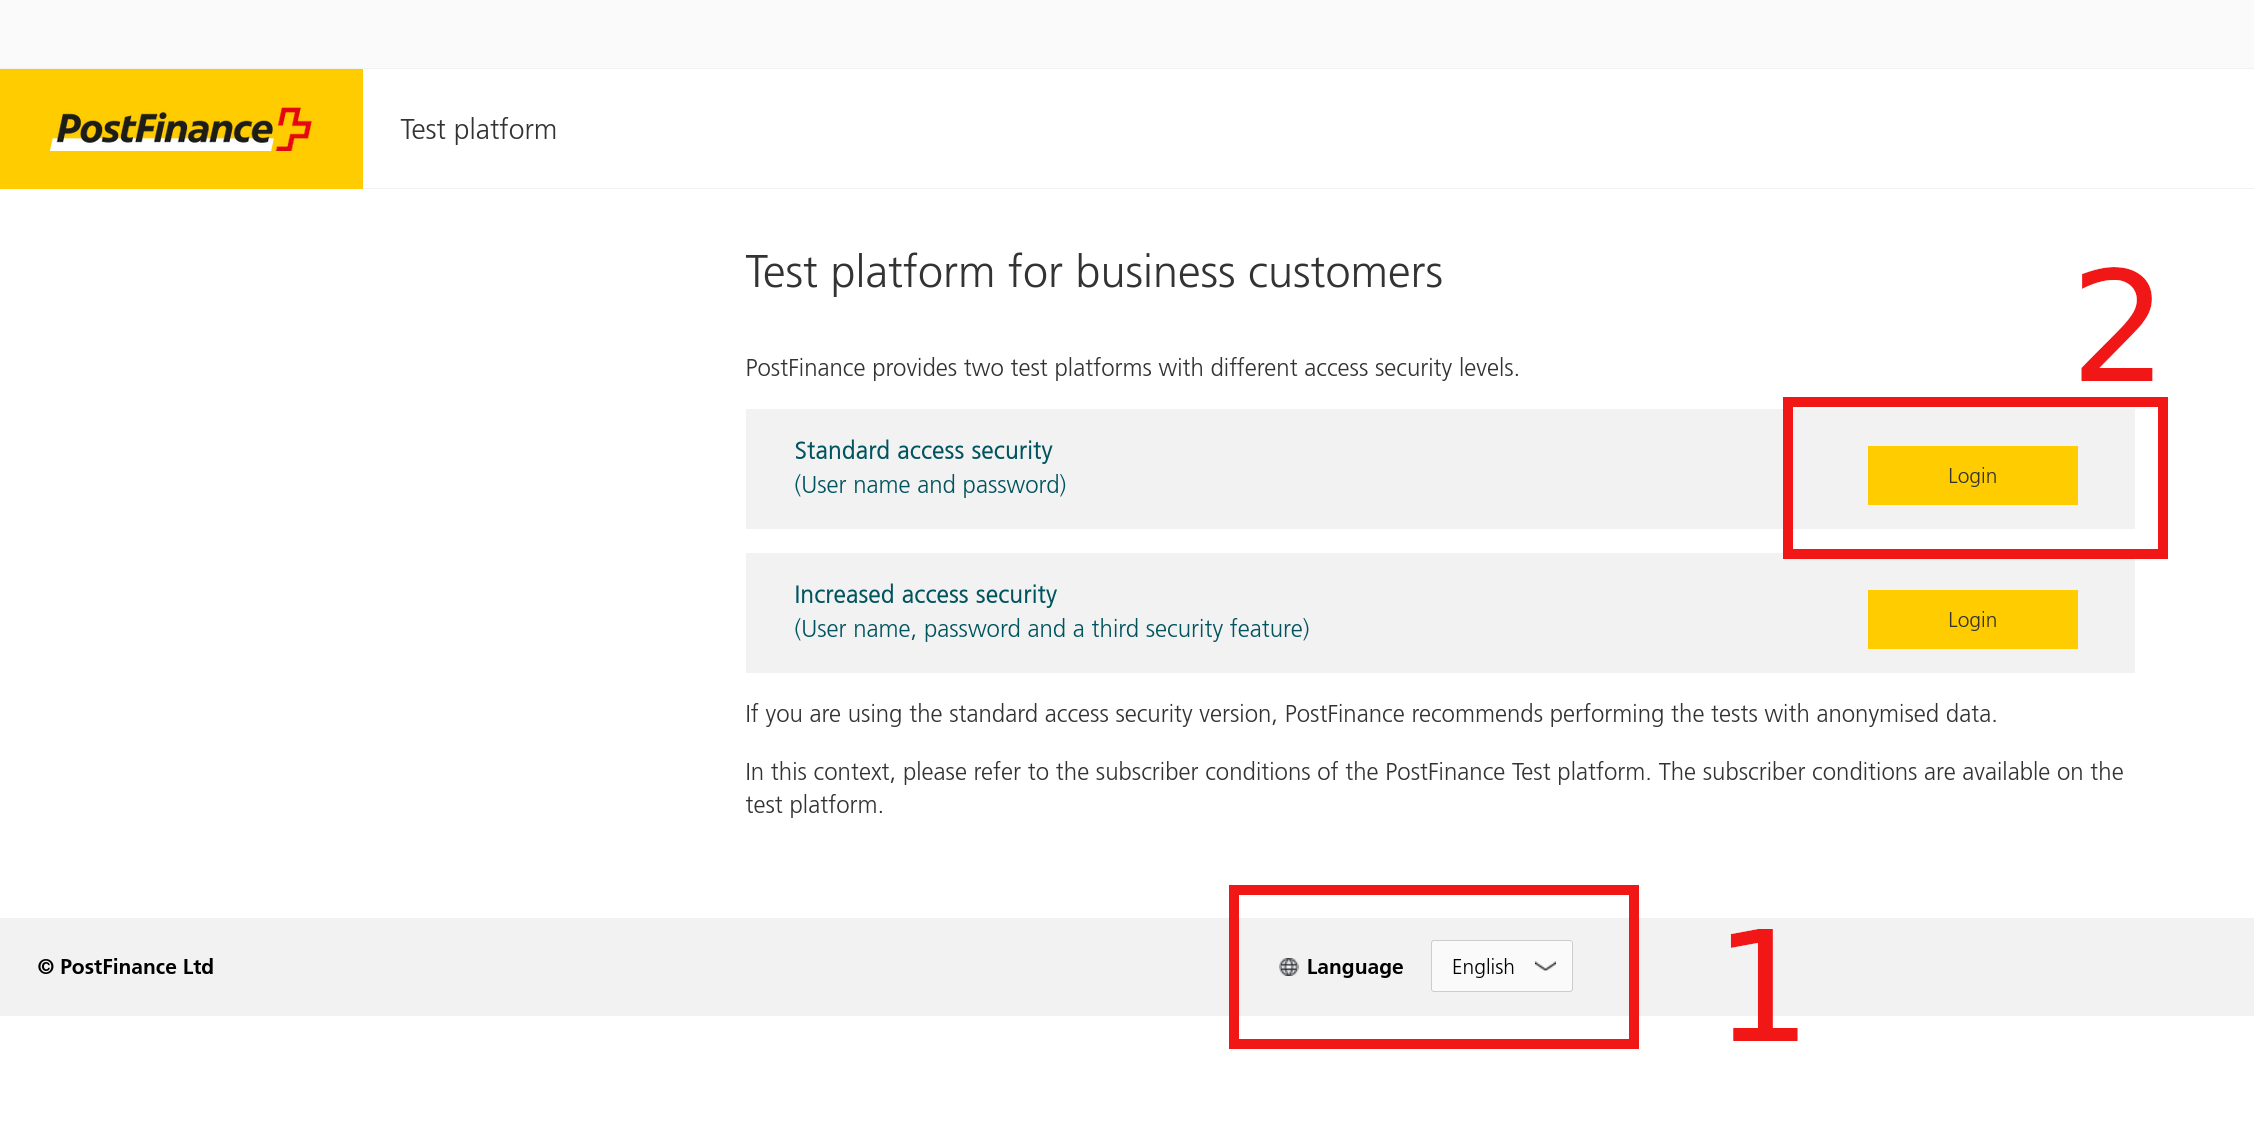
Even if the above page doesn’t welcome you in English, the two boxes in the screenshot will still hold their position, so please look for box #1 to set the language and for box #2 to get the page that offers to register.
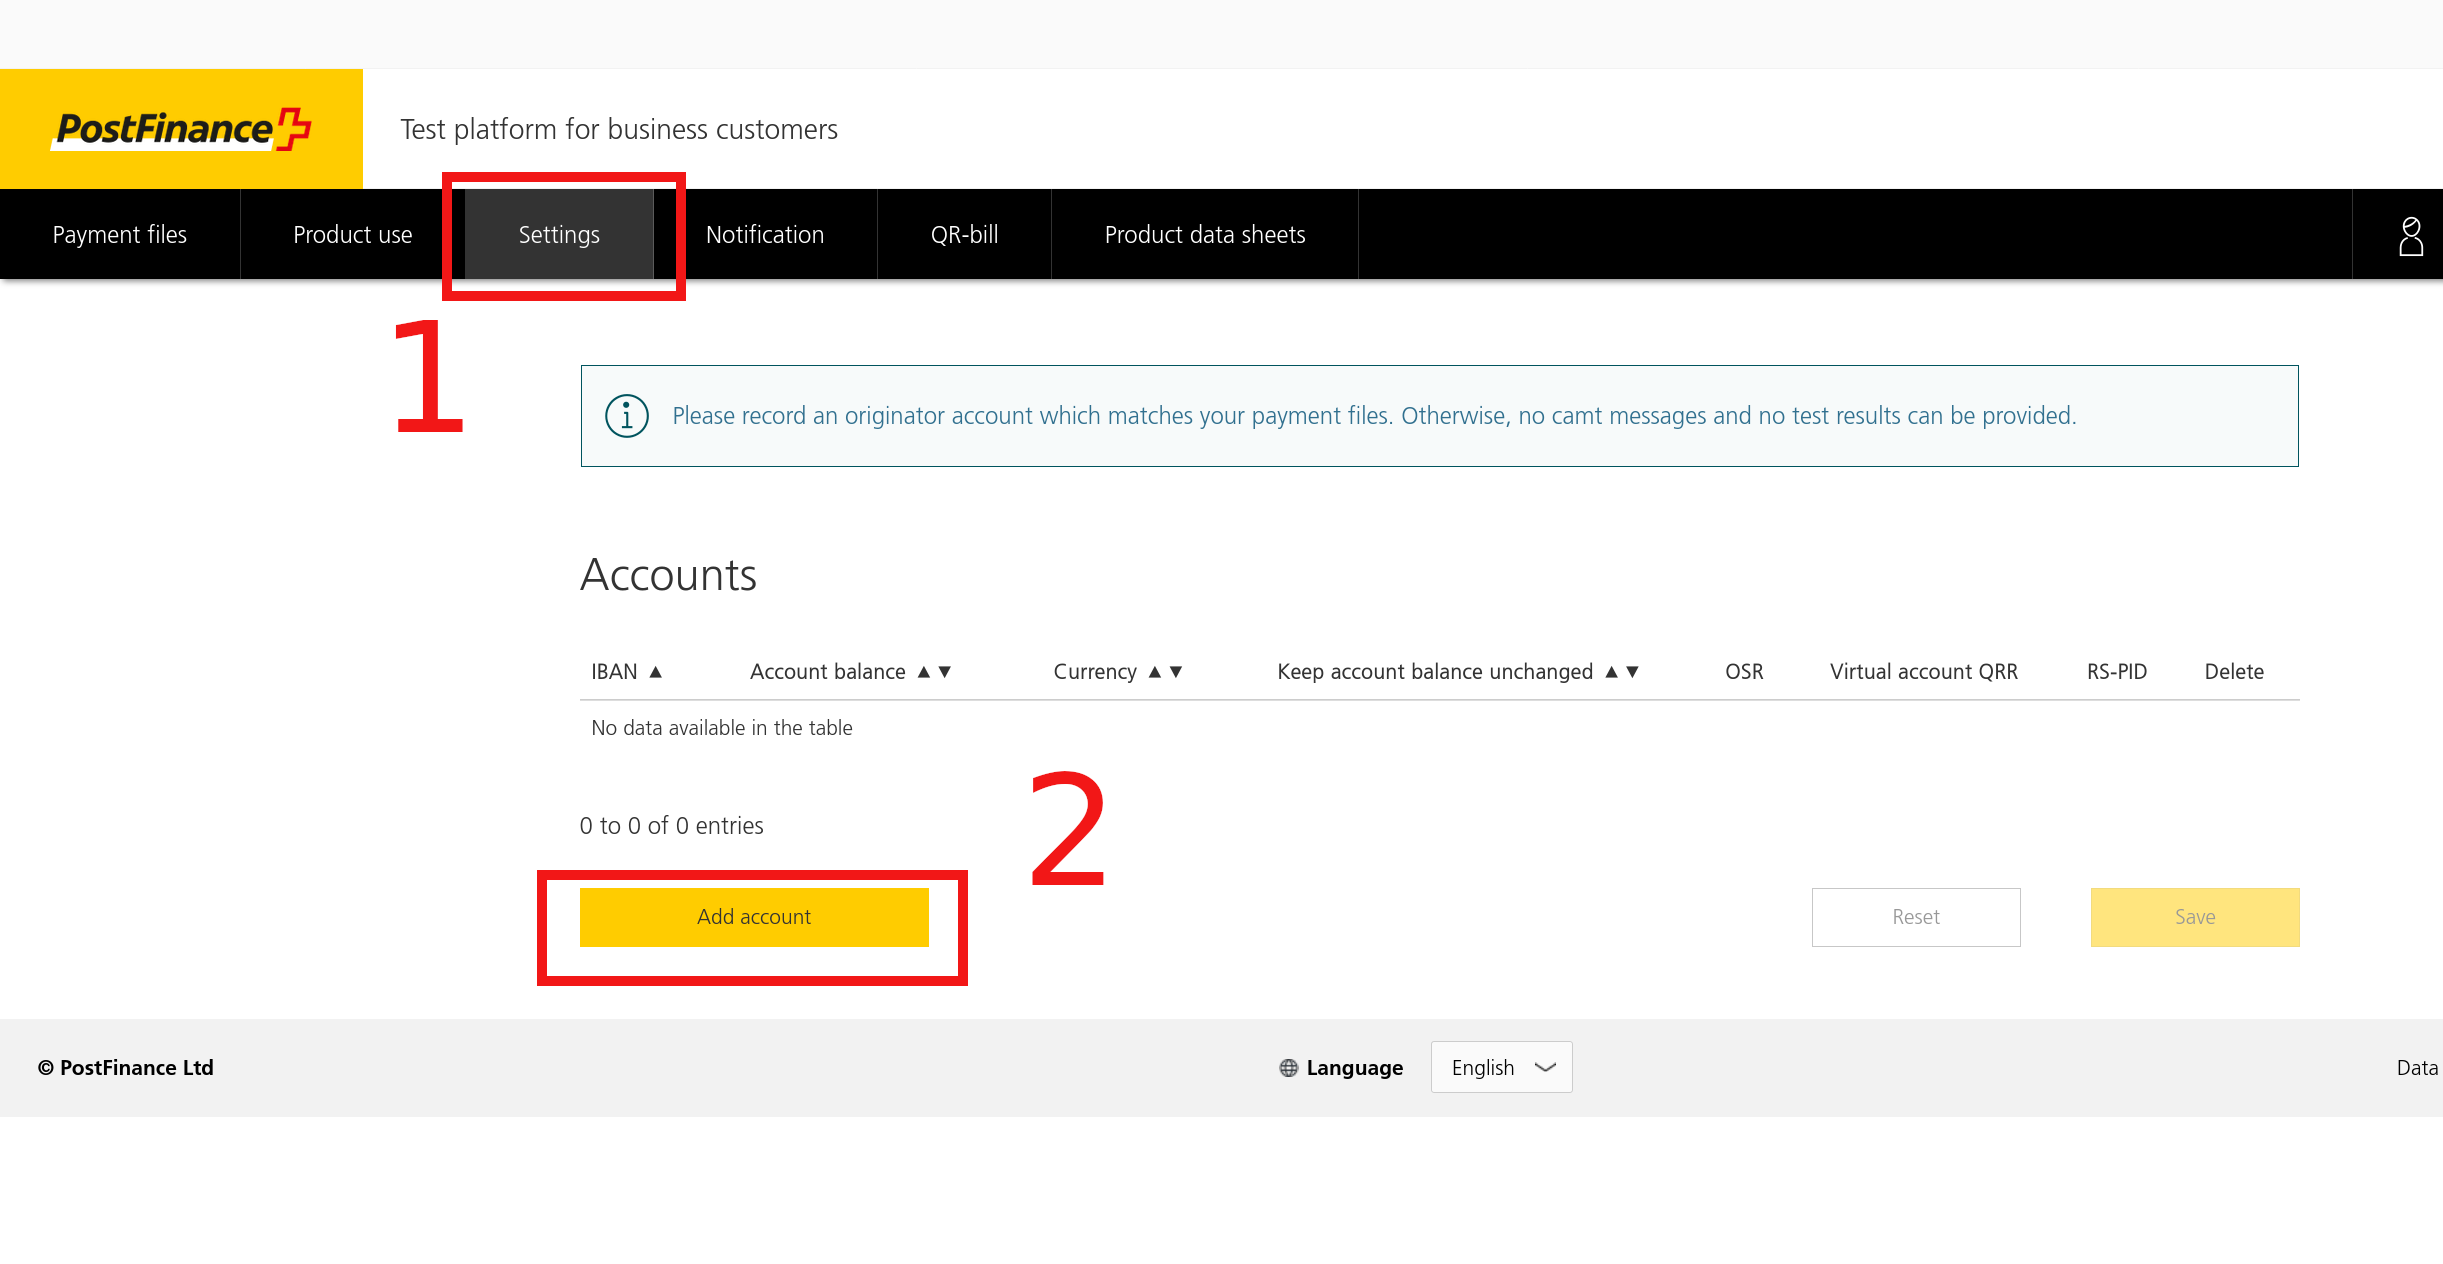
After a successful registration, an IBAN needs to be associated with the user just created. Likely after the first login, the following page should appear. Click then on box #2.
Note
The navigation bar in the screenshot below is ubiquitous, so click on box #1 if the depicted page did not show up automatically.
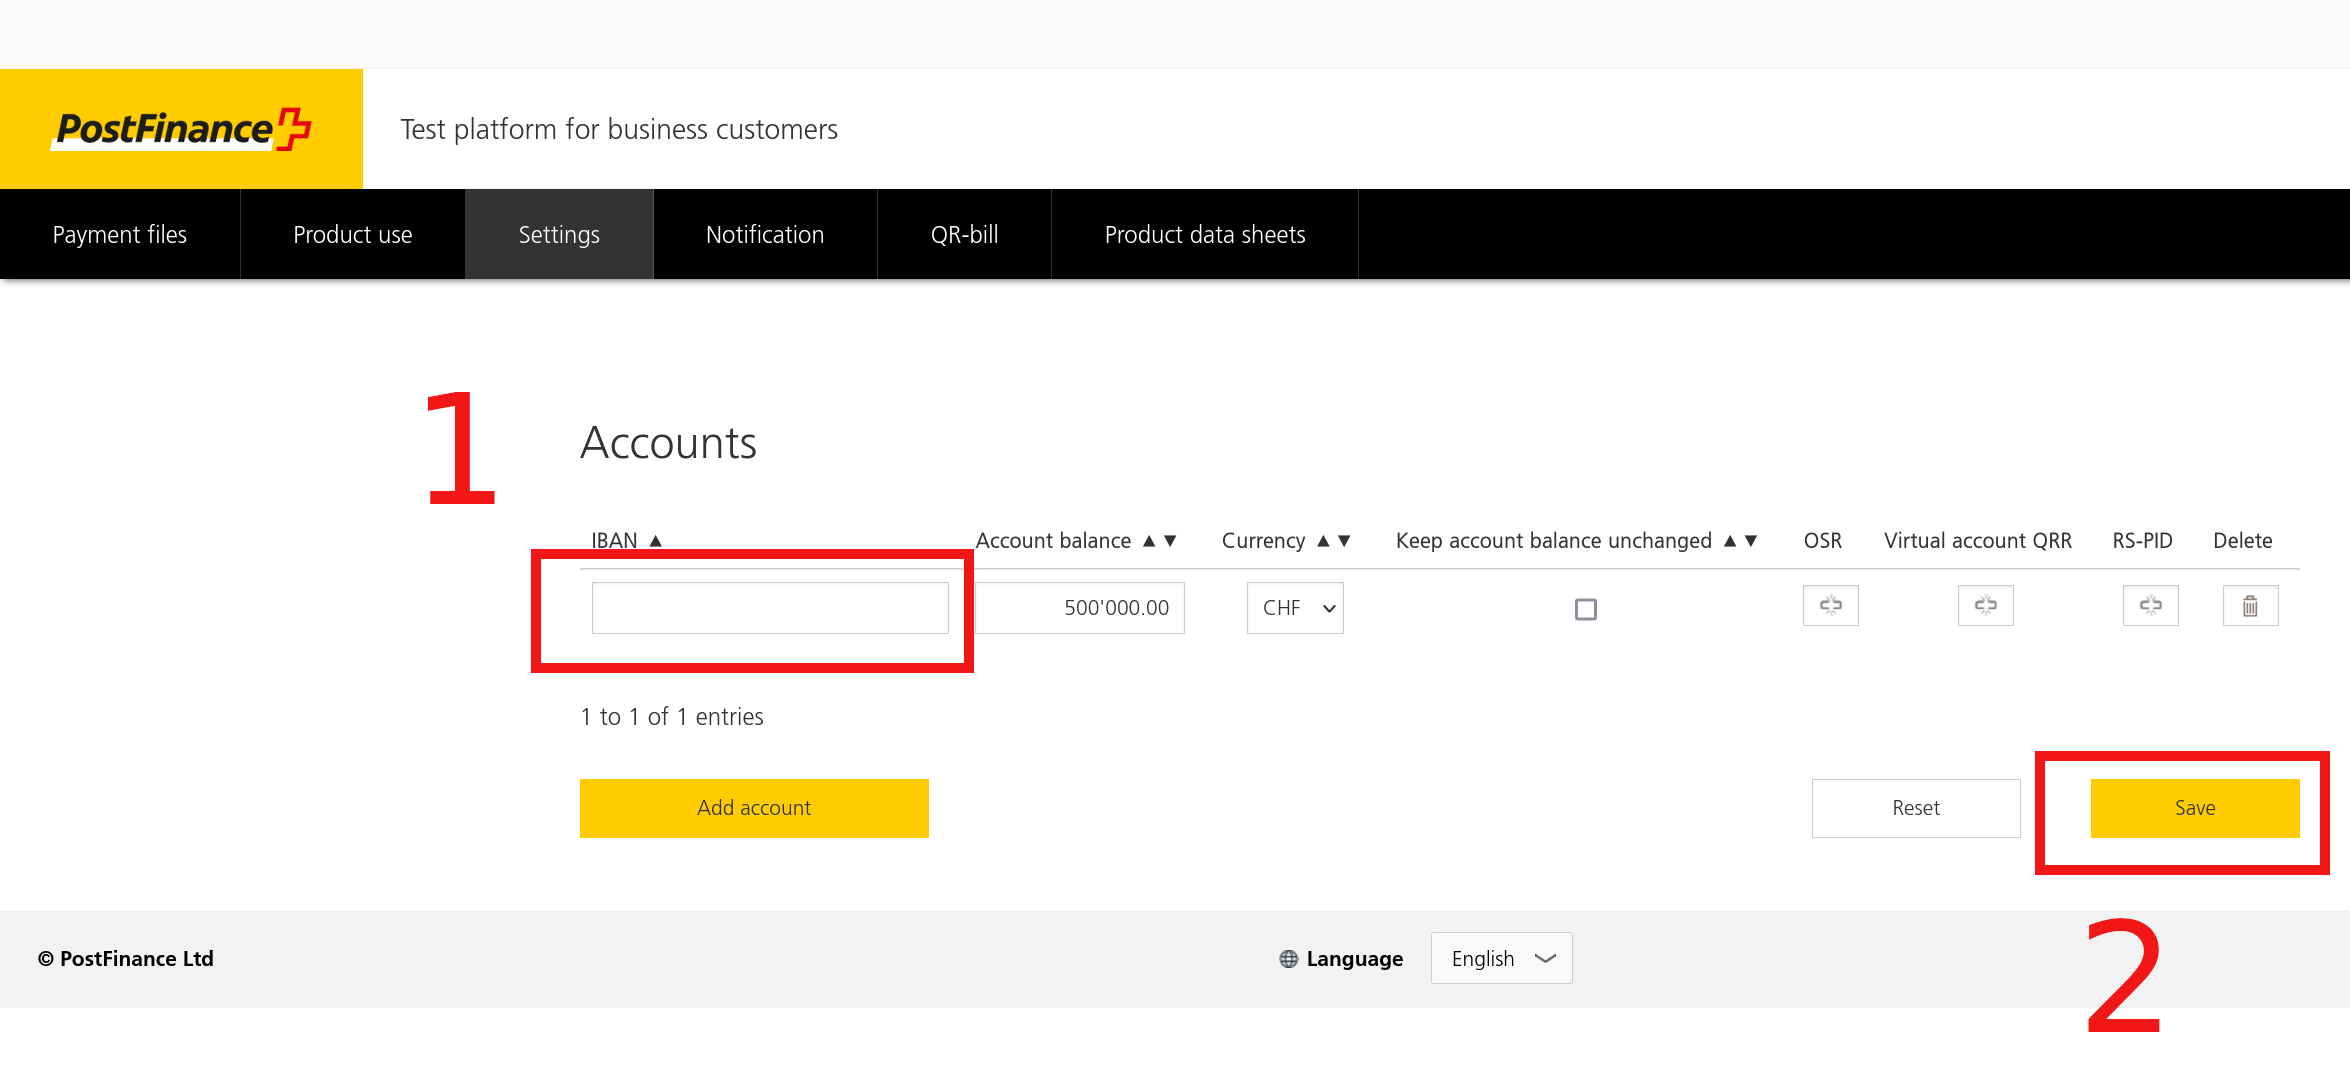
If the following page appears, please obtain a checksum-valid but fictitious Swiss IBAN and enter it as indicated by box #1 and then save it (box #2).
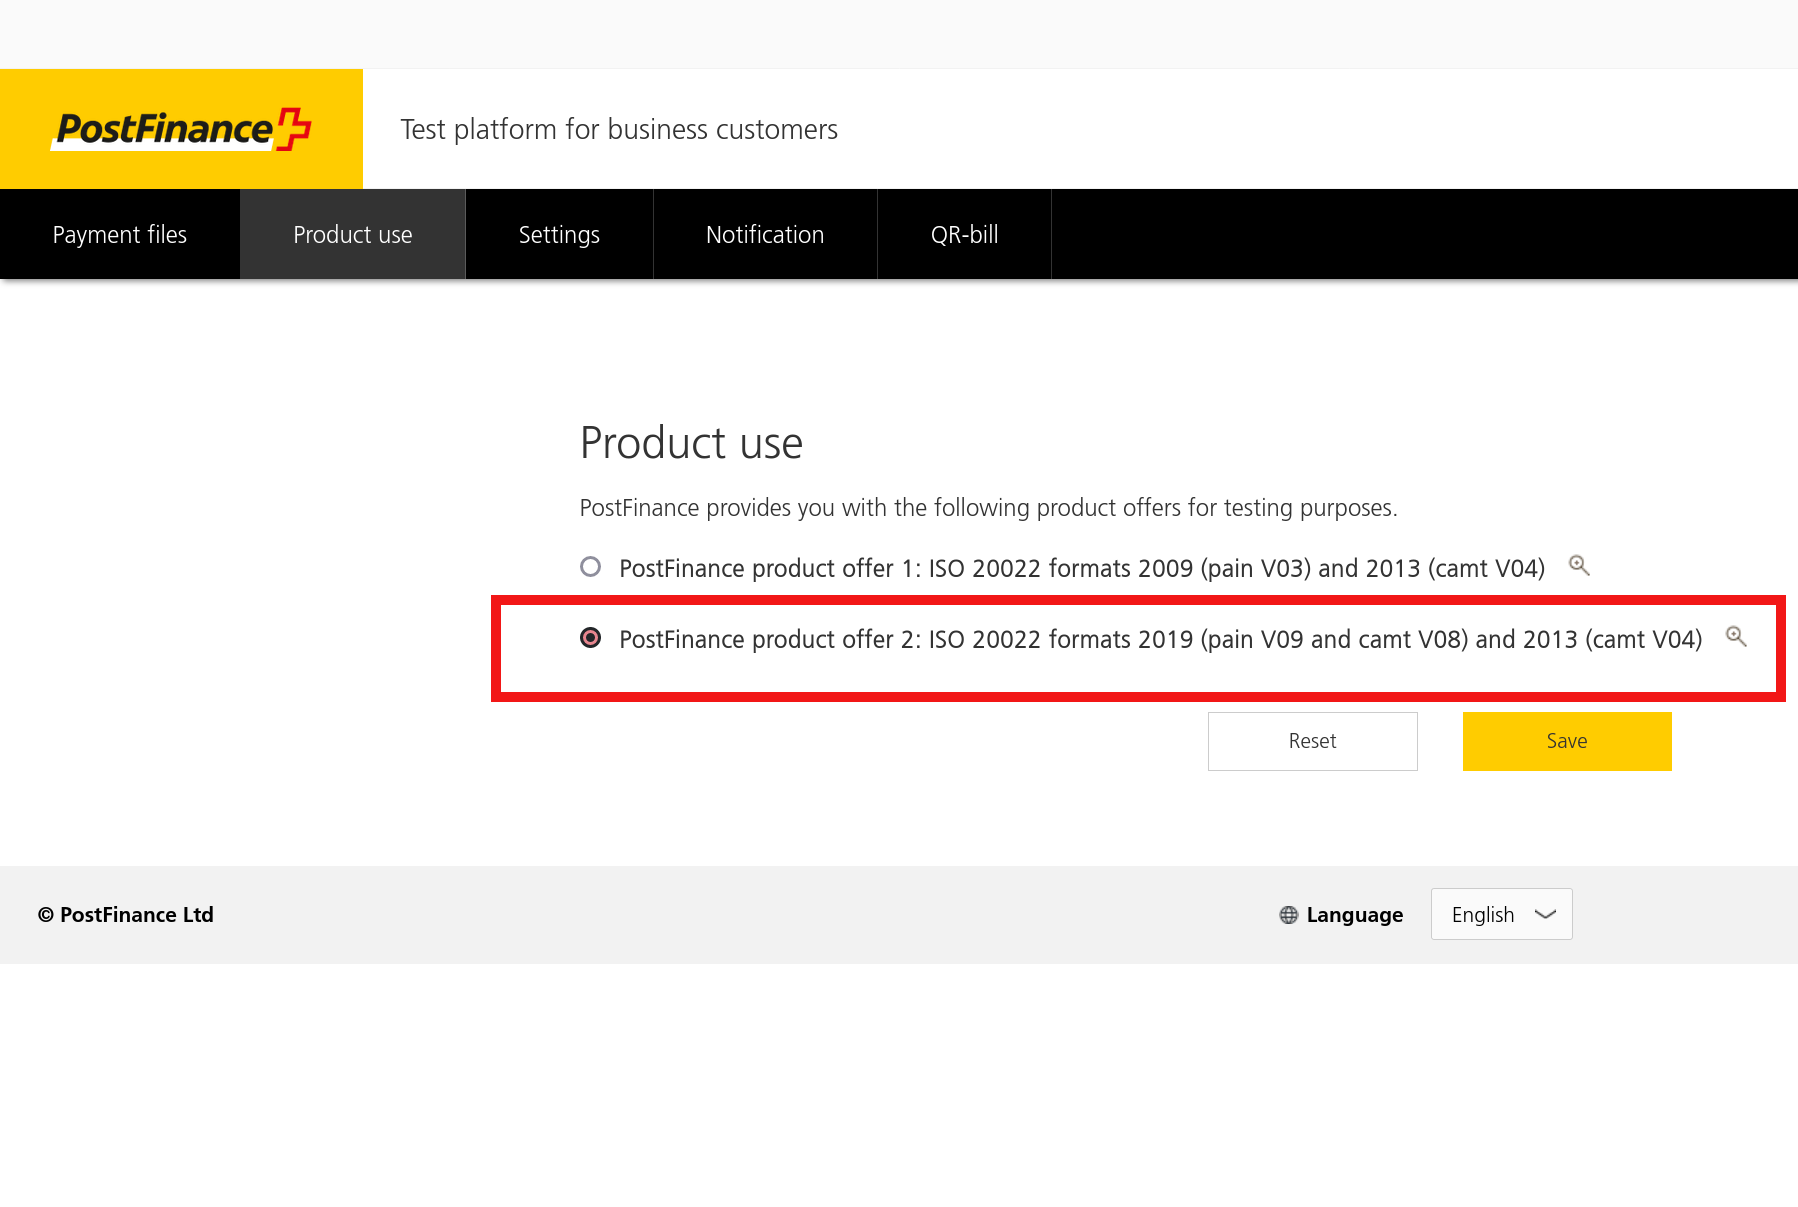
If the bank responds with a successful message, the next step is to enable EBICS 3 and set the format of the ISO20022 documents.
Note
There is no “use EBICS 3” setting since EBICS 3 is a “side effect” of choosing one particular ISO format for banking records.
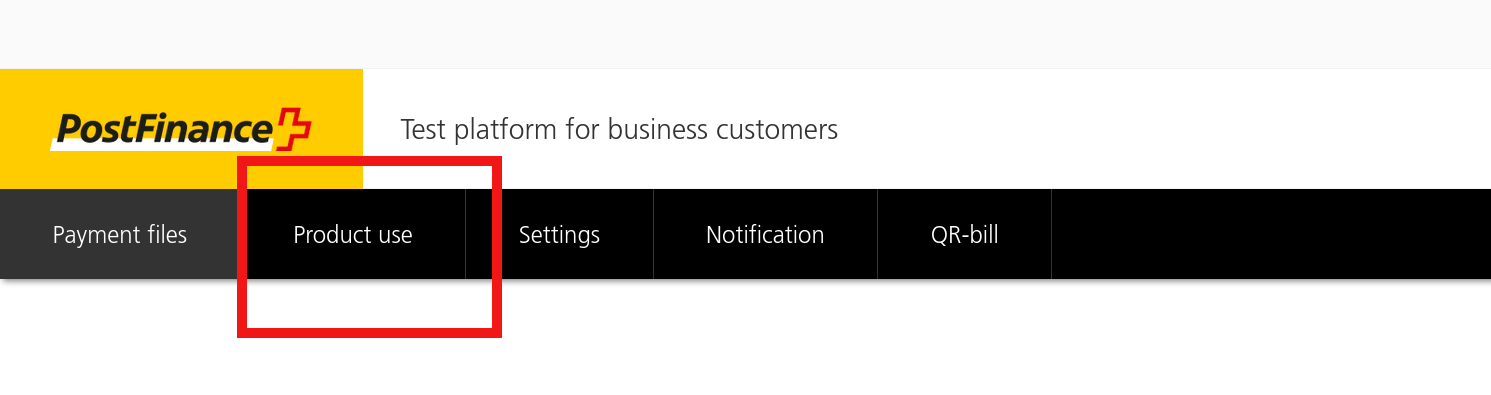
To use EBICS 3, click the navigation bar item highlighted in the following screenshot.
The following page should appear, where the ISO format can be specified as it is depicted in the following screenshot.
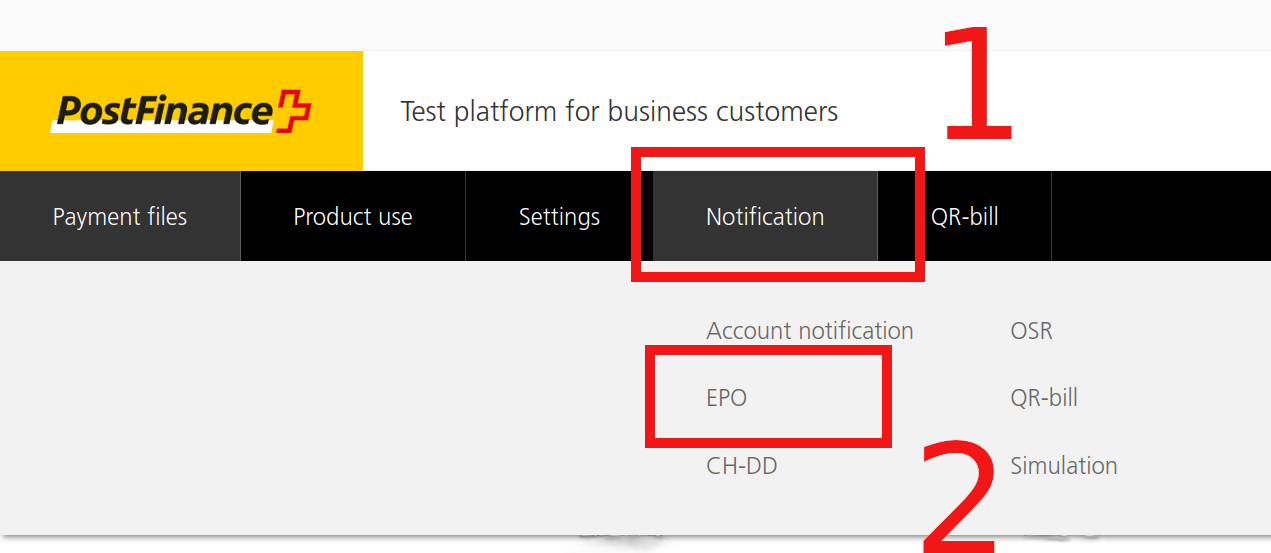
After having saved the setting, proceed now to set the flavor of payment confirmations. This setting instructs the bank to define particular XML nodes when it releases the payment confirmations. Even if each document is ISO20022, this step is essential because ISO20022 has many optional fields and client and bank must agree on which fields appear in the documents.
Hover on box #1 and then click on box #2.
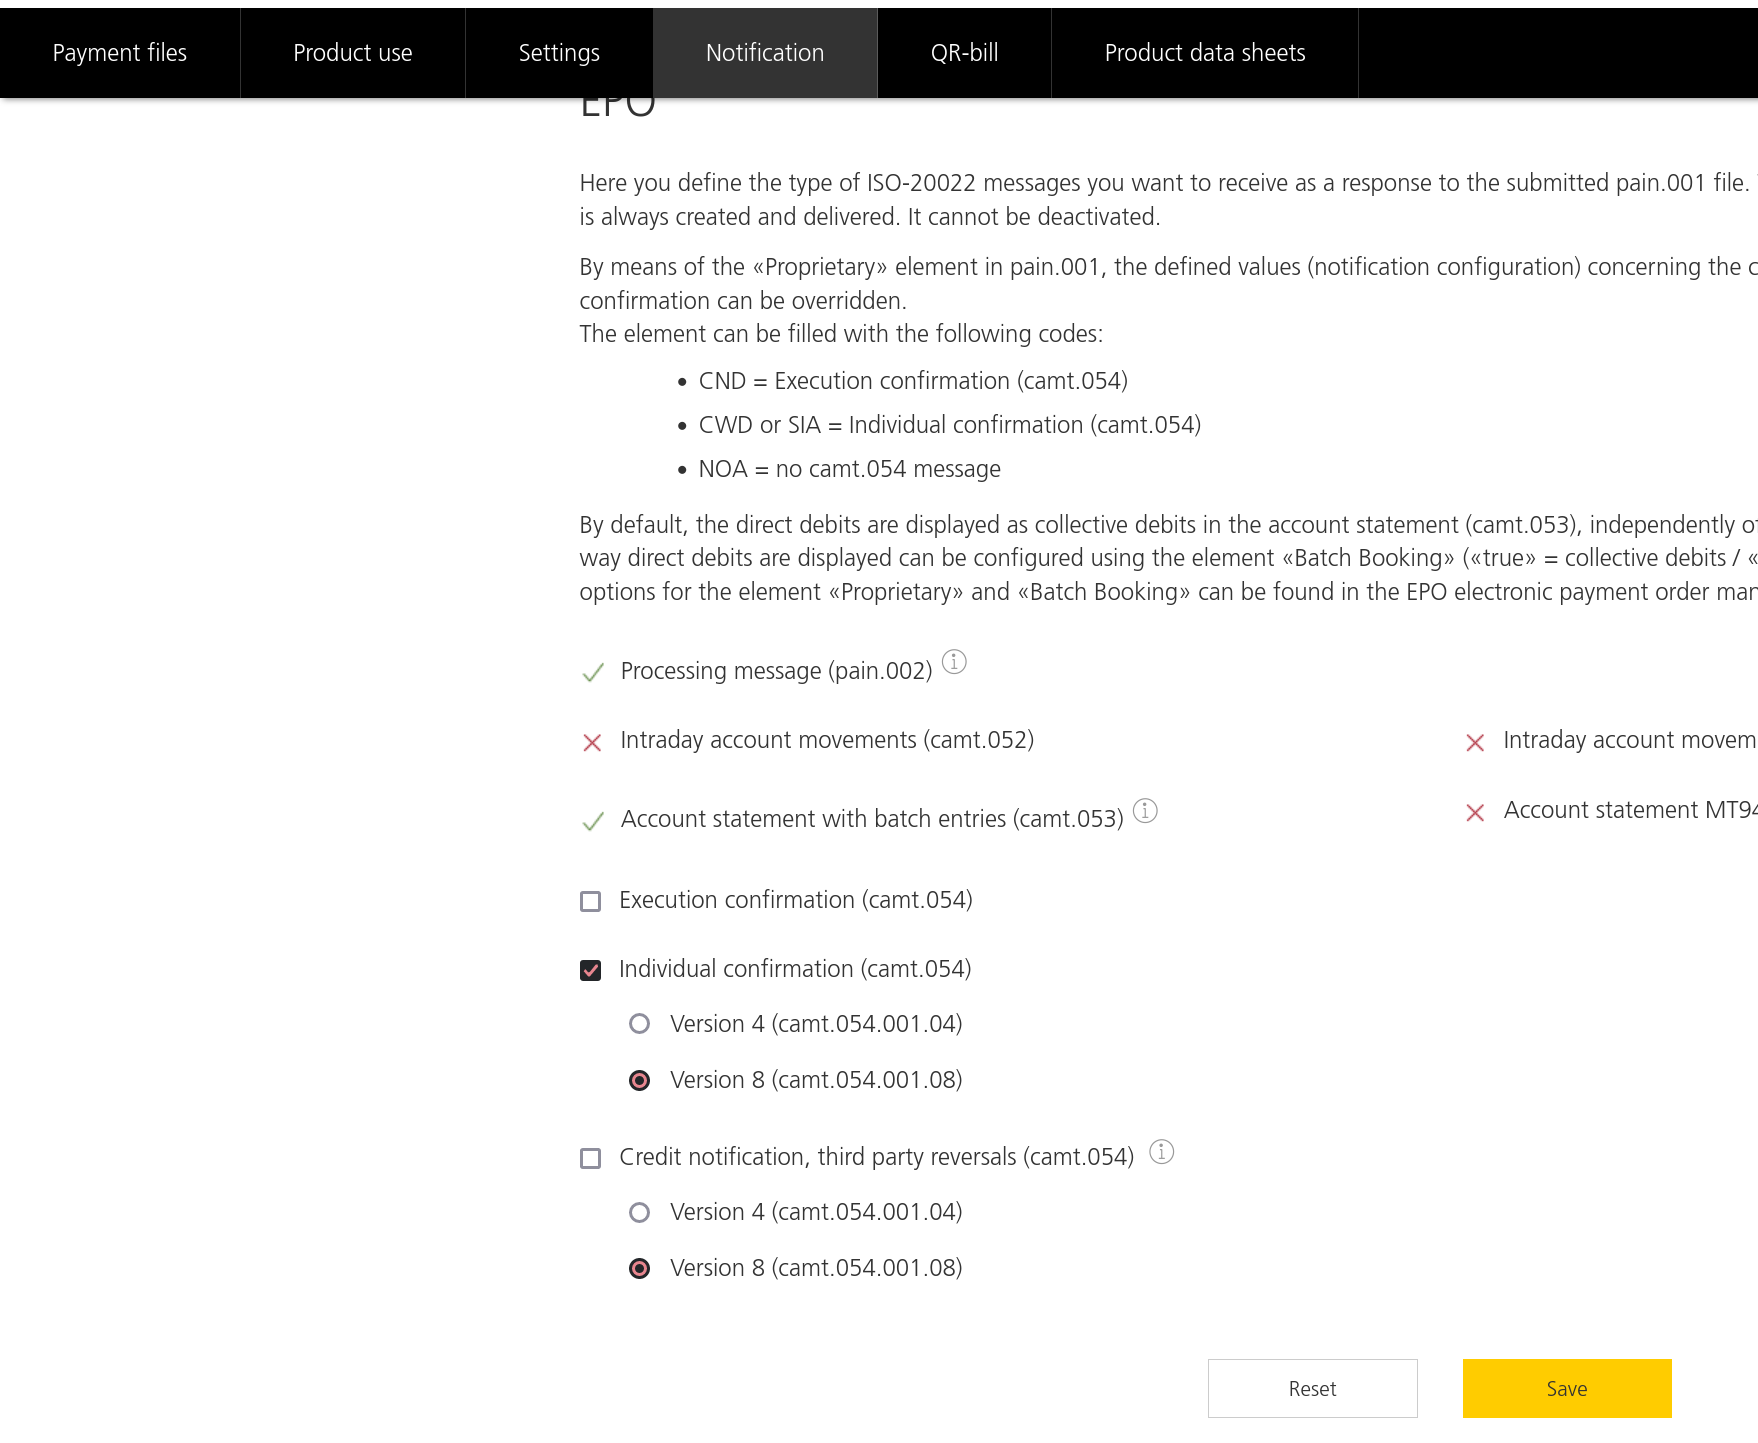
If the following page appears, please set everything as it is shown below:
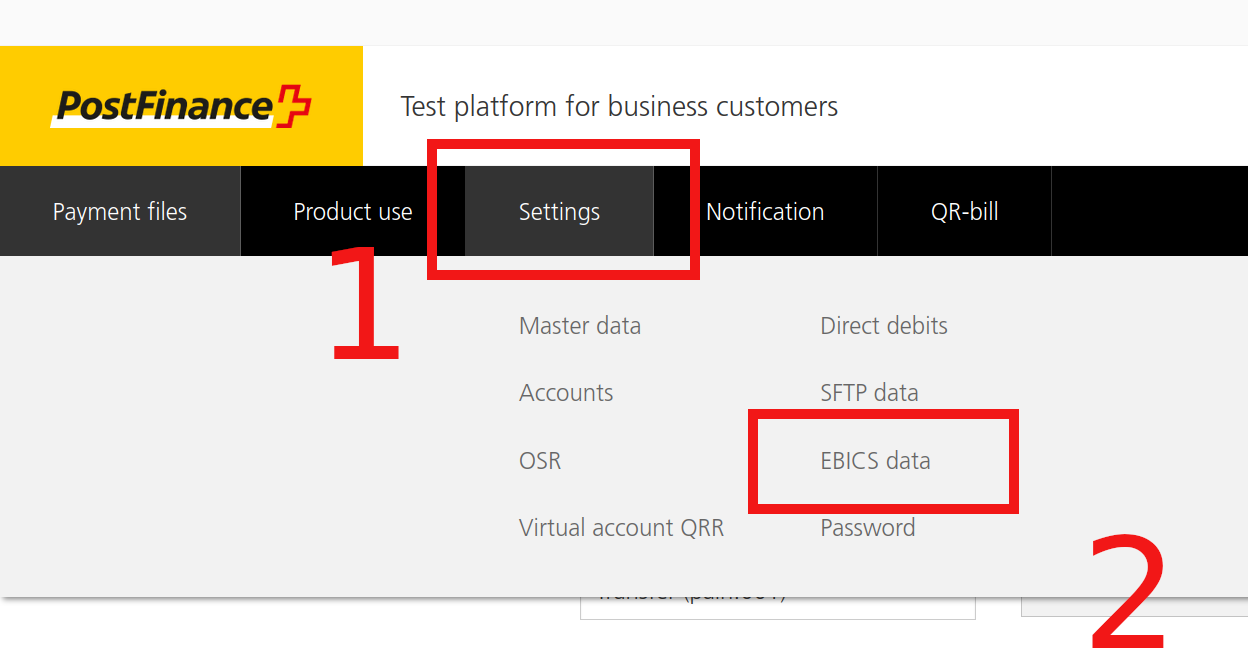
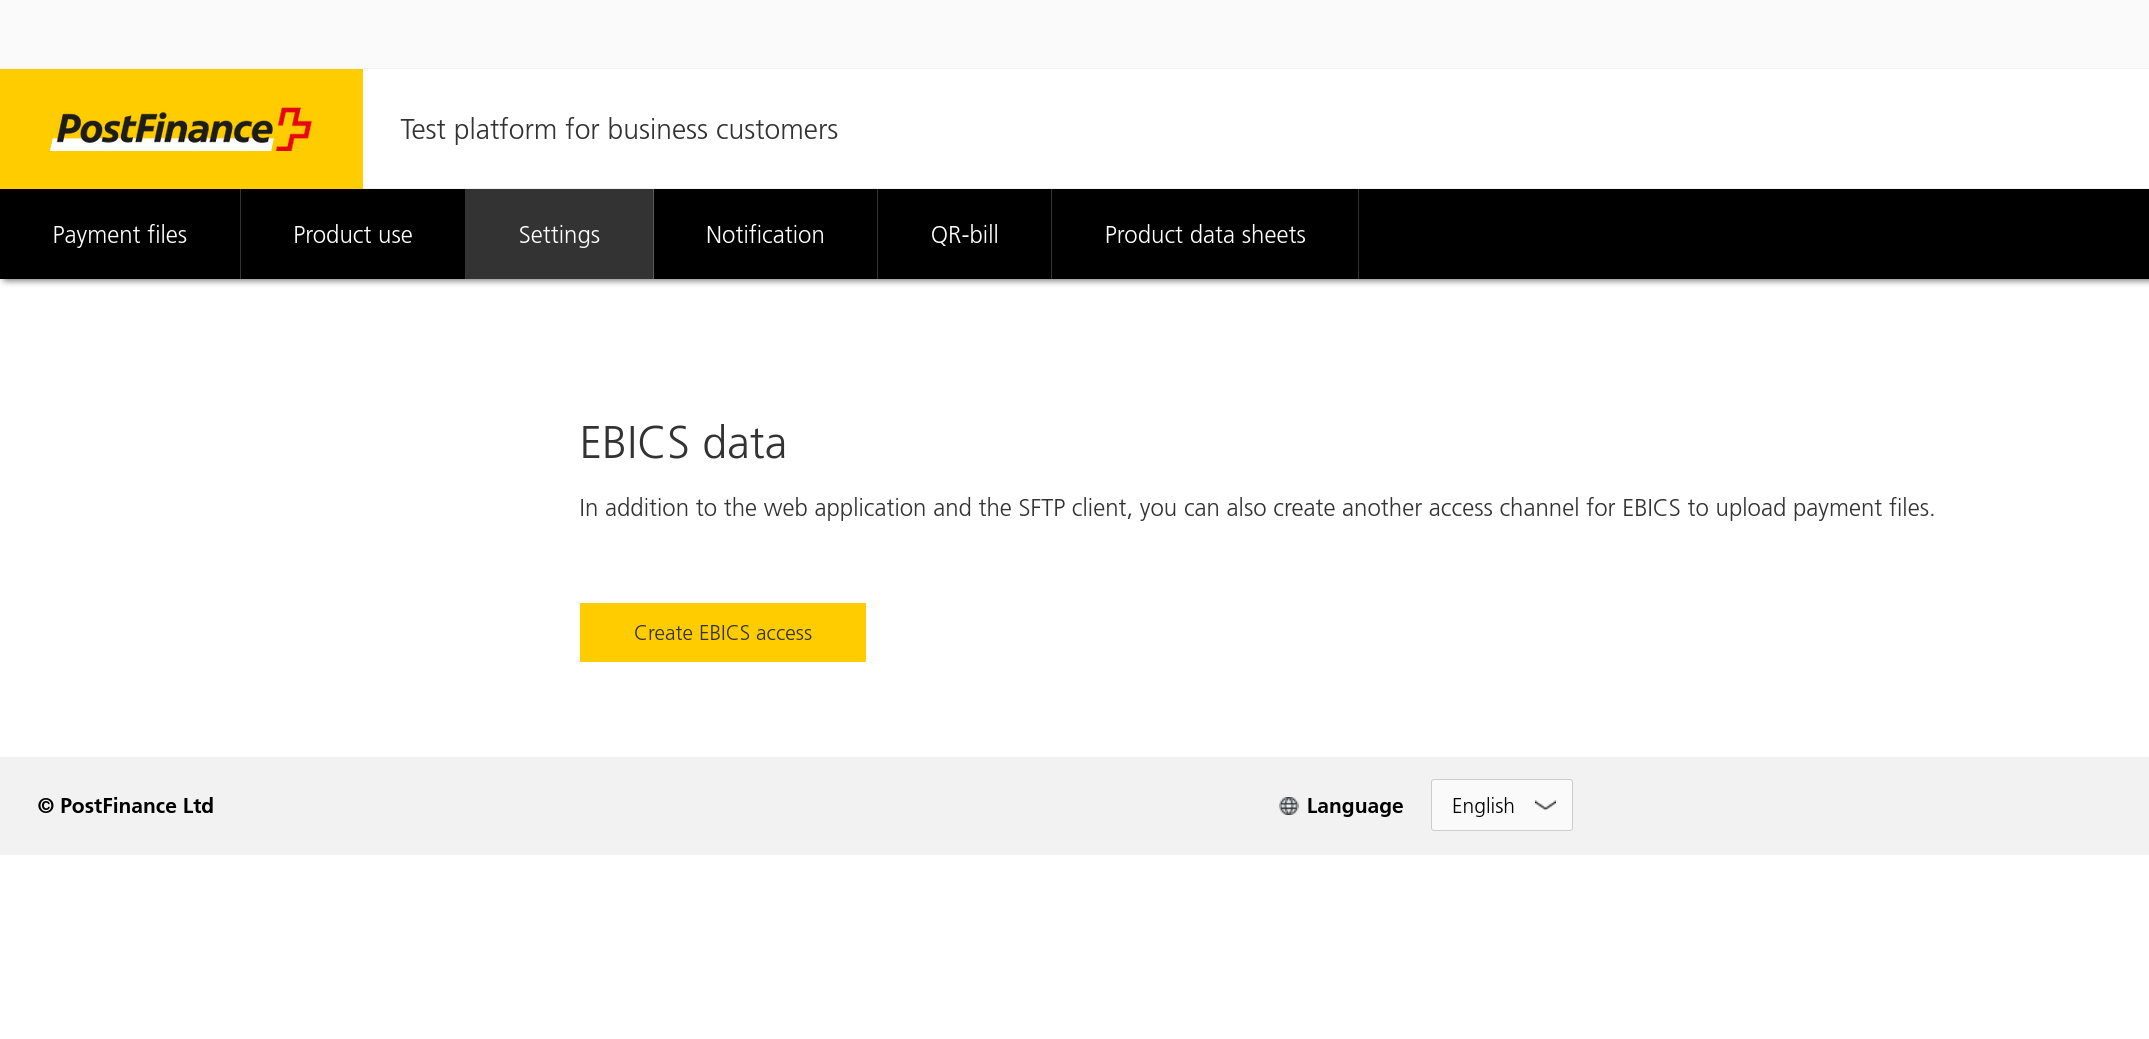
The last step is to retrieve the user’s EBICS identifiers, namely the EBICS user and partner IDs. Hover on box #1 and then click on box #2.
At the first access, the following page should appear. Simply create EBICS access and continue to the next step.
After having obtained the following page, finally the EBICS identifiers are shown in box #1.
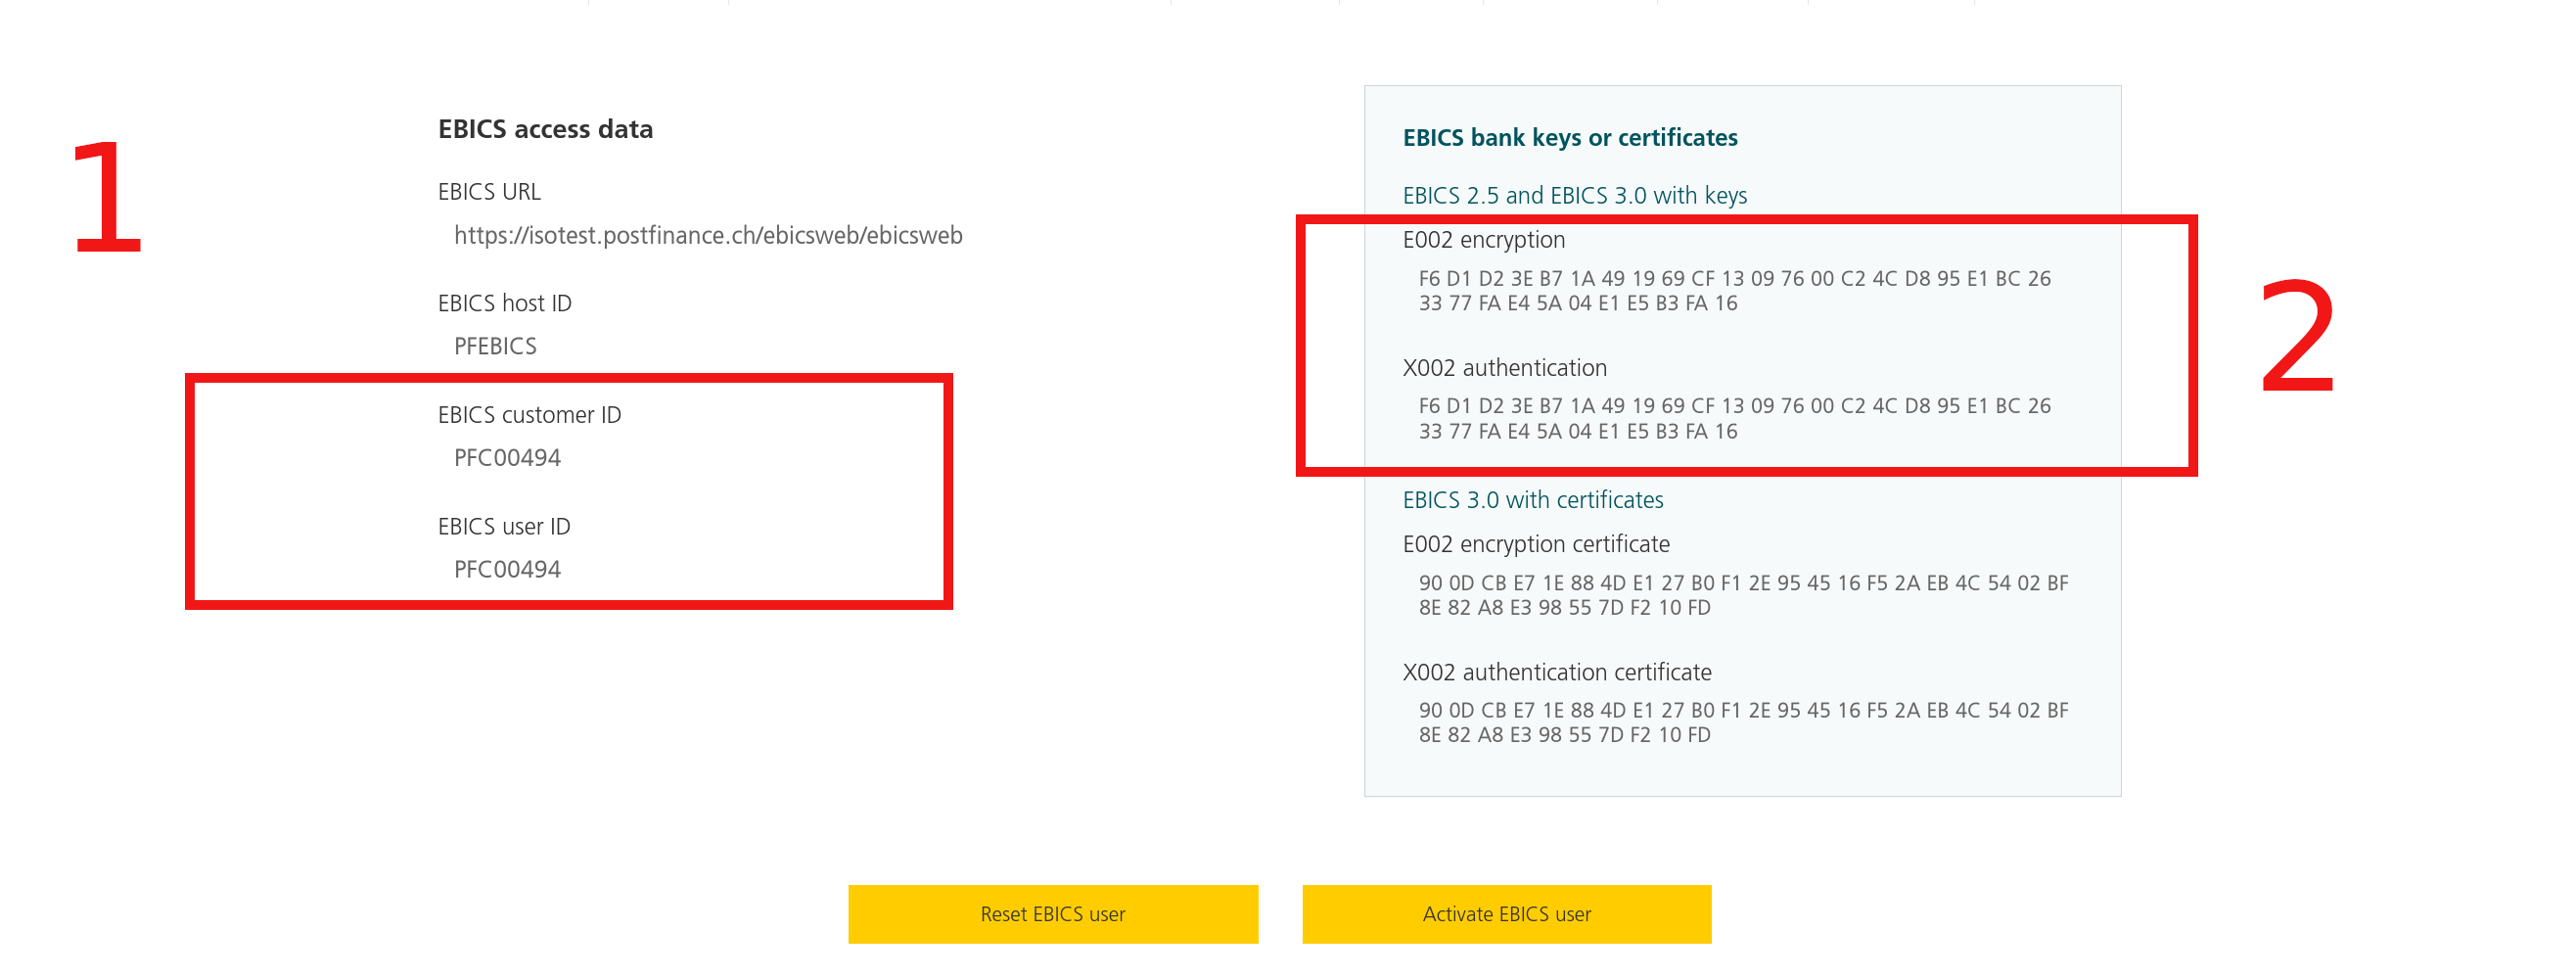
Finally, box #2 contains the bank keys fingerprints. These are important to check that the client, along the keying process, has obtained the right bank keys.