

7. Paivana Operator Manual#
7.1. Introduction#
Paivana is an approach to implement paywalls using GNU Taler.
For the seller, the Paivana design offers a scalable, cachable, static paywall with flexible payment options to sell access to digital assets. Aside from selling digital articles, Paivana can be used to protect servers against DDoS-attacks (say from botnets ignoring rate-limits), providing an alternative to Anubis.
For buyers, Paivana offers all of the conveniences, privacy and security features of the GNU Taler system. Paivana paywalls are also suitable for agentic payments, as agents can easily be provisioned with access to a GNU Taler wallet enabling them to purchase digital goods and services while limiting the financial risk to the amount of money placed into the agent’s wallet.
7.1.1. About this manual#
This manual targets system administrators who want to install, operate or integrate Paivana-based paywalls. To report issues or learn about known limitations, please check our bug tracker.
7.1.2. Overview#
At this point, there are several integration options for Paivana-style paywalls:
Using the Paivana reverse proxy: This is a generic solution suitable for any HTTP-based service. By placing the Paivana reverse proxy before the existing HTTP service, clients can be required to pay before accessing the service, without requiring any changes to the service itself. One consideration is that integrating the Paivana reverse proxy seamlessly into the site’s existing look-and-feel can require additional customization, and payment rule configurations are managed separately from the site’s core content.
Using the Drupal Paivana extension: This extension works basically for any Drupal site, making it easy to keep the overall look-and-feel of the site. Prices can be configured per article within the site itself. The extension only works for Drupal.
Using the Wordpress Paivana extension: This extension works basically for any Wordpress site, making it easy to keep the overall look-and-feel of the site. Prices can be configured per article within the site itself. The extension only works for Wordpress.
In all cases, Paivana additionally requires access to a GNU Taler merchant backend. It is assumed that such a backend is available and configured to process orders. When setting up the respective Paivana service, you must have the base URL, username and password of the selected merchant backend at hand.
7.2. Paivana-httpd#
This chapter documents the installation and operation of the Paivana
reverse proxy paivana-httpd. The reverse proxy sits between the
public Internet and an upstream Web service, intercepting requests
that have not yet been paid for and presenting the client with a
GNU Taler paywall. Once a payment has been confirmed by the
configured GNU Taler merchant backend, paivana-httpd forwards
subsequent requests of that client to the upstream service.
The full list of command-line options is documented in paivana-httpd(1); the configuration file is documented in paivana.conf(5).
7.2.1. Motivation and use cases#
paivana-httpd answers a single question for every incoming
request — “has the client paid for this?” — but operators deploy it
for two rather different reasons. Which one applies to you mostly
changes how you price the templates (see Configuring Paivana templates),
not how you install or run the daemon.
7.2.1.1. Selling access: a paywall with revenue#
The classic use case is to charge money for access to digital content or services: a news article, a research dataset, an API call, a file download. Because Paivana builds on GNU Taler, this comes with properties that distinguish it from traditional paywalls:
No accounts, no sign-up. A visitor pays directly from a Taler wallet; there is no registration, no login, and no credit-card form. This removes the friction that kills conversion on per-article purchases.
Micropayments are practical. Taler’s costs per transaction are low enough that charging fractions of a cent for a single page is economically meaningful, enabling true pay-per-article or pay-per-request business models.
Privacy for the buyer. Taler is privacy-preserving by design: the seller (and Paivana) learns that an order was paid, not who paid it. No tracking profile is required to gate the content.
Subscriptions and discounts. A template’s
choicescan offer a one-off payment or the purchase/redemption of a subscription token, so returning subscribers pass the paywall automatically (see Configuring Paivana templates).Agentic payments. Every paywall response also carries a machine-readable
Paivana:HTTP header (see Customizing the paywall page). An automated client — for example an AI agent provisioned with a Taler wallet — can therefore pay and fetch the resource without rendering the HTML page, while the operator caps financial exposure to whatever was loaded into that agent’s wallet.
7.2.1.2. Rate-limiting bots and abuse: DDoS and scraper protection#
The second use case treats the payment not as a source of revenue but as a cost imposed on the client — economic rate limiting. Here you set the price very low (a fraction of a cent, effectively a “CAPTCHA token”): negligible for a human visitor reading a handful of pages, but ruinous for a botnet or scraper that wants to issue millions of requests. An attacker sending a million requests must spend a million micropayments; a legitimate user spends almost nothing.
This is a deliberate alternative to two older defenses whose cost-asymmetry has eroded:
Proof-of-work puzzles (as used by tools such as Anubis) ask the client to burn CPU before being served. But CPU is cheap and abundant for a well-resourced attacker or botnet, and the puzzle burdens low-powered legitimate devices (phones, assistive tech) the most.
CAPTCHAs ask the client to solve a perception task. Modern LLMs and automated solvers now clear text, image and even “behavioral” CAPTCHAs cheaply and at scale, so they increasingly inconvenience humans while barely slowing down the bots they were meant to stop.
A Taler payment sidesteps both problems: it does not rely on a human
being slow, or on a machine being computationally weak. It relies on
the one resource a flooding attacker genuinely cannot conjure for free
— money. Bots can solve puzzles and CAPTCHAs; they cannot mint
funds. For this use case you typically combine a low per-request
price with a subscription-token choice so that a paying or
authenticated user buys a token once and then sails through, while
anonymous floods keep paying per request.
Note
The two use cases are not mutually exclusive: the same deployment
can earn revenue on premium URLs and simultaneously throttle abuse
on cheap ones, simply by defining several templates with different
prices and website_regex scopes.
7.2.2. Architecture overview#
paivana-httpd does not implement any payment logic of its own.
Instead, every Paivana deployment combines three components:
The upstream web service. This is the existing HTTP service whose content should be sold (a static website, a cgit service, a REST API, …). It does not need to be modified to work with Paivana.
A GNU Taler merchant backend (
taler-merchant-httpd). The merchant backend manages templates, creates orders, talks to one or more Taler exchanges, and ultimately reports back whether a given order has been paid. See the Taler Merchant Backend Operator Manual for full details.``paivana-httpd`` itself. This is the reverse proxy that gates the upstream service. It reads a single paivana.conf configuration file that points at both the merchant backend and the upstream service.
Typically a TLS-terminating reverse proxy (Nginx or Apache) is
deployed in front of paivana-httpd to handle HTTPS and to route
multiple virtual hosts; see Reverse proxy configuration below.
In normal operation the request flow is:
client ──▶ Nginx/Apache (TLS) ──▶ paivana-httpd ──▶ upstream
                                       │
                                       ▼
                               taler-merchant-httpd
                                       │
                                       ▼
                                 Taler exchange
7.2.3. Installation#
7.2.3.1. Installing from source#
The package sources can be found in our download directory.
GNU Taler components follow the MAJOR.MINOR.MICRO version
scheme. The general rule for compatibility is that MAJOR and
MINOR must match across components; exceptions are noted in the
release notes. For example, paivana-httpd 1.6.x is expected to
work with taler-merchant-httpd 1.6.x. A MAJOR version of 0
indicates experimental development; in that case you should always
run the latest releases of every component together.
The following packages must be installed before compiling
paivana-httpd:
GNUnet (
libgnunetutil) matching the Taler releaseGNU Taler exchange libraries (
libtalerexchange,libtalerutil)GNU Taler merchant client library (
libtalermerchant)GNU Taler HTTP daemon helpers (
libtalermhd,libtalertemplating)libmicrohttpd, libcurl, libjansson, libgcrypt, zlib
Build and install with:
$ ./bootstrap
$ ./configure --prefix=$PREFIX
$ make
$ sudo make install
7.2.3.2. Installing the binary packages on Debian#
To install the GNU Taler Debian packages, first ensure that you have the right Debian distribution. At this time, the packages are built for Debian trixie.
You need to add a file to import the GNU Taler packages. Typically,
this is done by adding a file /etc/apt/sources.list.d/taler.list that
looks like this:
deb [signed-by=/etc/apt/keyrings/taler-systems.gpg] https://deb.taler.net/apt/debian trixie main
Next, you must import the Taler Systems SA public package signing key into your keyring and update the package lists:
# wget -O /etc/apt/keyrings/taler-systems.gpg \
    https://taler.net/taler-systems.gpg
# apt update
Note
You may want to verify the correctness of the Taler Systems SA key out-of-band.
Now your system is ready to install the official GNU Taler binary packages using apt.
To install paivana-httpd you can now simply run:
# apt install paivana-httpd
The package does not perform any deployment-specific configuration
work; it only sets up the paivana-httpd system user, the systemd
service and socket units, and installs example configuration
snippets for Nginx and Apache under /etc/nginx/sites-available/
and /etc/apache2/sites-available/. You still must configure the
HTTP request routing and the Paivana templates as described below.
7.2.3.3. Installing the binary packages on Ubuntu#
To install the GNU Taler Ubuntu packages, first ensure that you have
the right Ubuntu distribution. At this time, the packages are built for
Ubuntu Lunar and Ubuntu Jammy. Make sure to have universe in your
/etc/apt/sources.list.d/ubuntu.sources (after main)
as we depend on some packages from Ubuntu universe.
A typical /etc/apt/sources.list.d/taler.list file for this setup
would look like this for Ubuntu Noble:
deb [signed-by=/etc/apt/keyrings/taler-systems.gpg] https://deb.taler.net/apt/ubuntu/ noble main
Next, you must import the Taler Systems SA public package signing key into your keyring and update the package lists:
# wget -O /etc/apt/keyrings/taler-systems.gpg \
    https://taler.net/taler-systems.gpg
# apt update
Note
You may want to verify the correctness of the Taler Systems key out-of-band.
Now your system is ready to install the official GNU Taler binary packages using apt.
To install paivana-httpd, run:
# apt install paivana-httpd
As on Debian, the package does not perform any deployment-specific configuration work.
7.2.4. Configuring paivana-httpd#
The main configuration file is /etc/paivana/paivana.conf. Its
syntax follows the standard GNUnet configuration file format and is
documented in full in paivana.conf(5). Files under
$PREFIX/share/paivana/config.d/ are read first and overridden by
it, but Paivana installs none: every option is either required or has
the default stated with it in paivana.conf(5).
All Paivana-specific keys live in the [paivana] section. At a
minimum, the file must specify three things:
where
paivana-httpdshould listen for incoming requests (SERVE,UNIXPATH/PORT);where it should forward paid requests to (
DESTINATION_BASE_URL);how it should reach the merchant backend (
MERCHANT_BACKEND_URLandMERCHANT_ACCESS_TOKEN).
A typical configuration that listens on a UNIX domain socket managed by systemd and forwards to a local upstream server looks like this:
[paivana]
# Listen on the socket provided by paivana-httpd.socket.
SERVE = unix
UNIXPATH = /run/paivana/httpd/paivana-http.sock
UNIXPATH_MODE = 660

# Public base URL of this paywall as seen by clients.
# Used when the Host/X-Forwarded-Host headers are unavailable.
BASE_URL = https://paywall.example.com/

# Upstream service that gets proxied after payment.
DESTINATION_BASE_URL = http://127.0.0.1:8080/

# Merchant backend used to create and verify orders.
MERCHANT_BACKEND_URL = http://localhost:9966/
MERCHANT_ACCESS_TOKEN = secret-token:CHANGE-ME

# Stable key material used to MAC the access cookie.  Must be
# generated from a random source, not invented; see below.  If
# unset, a random value is generated at every startup,
# invalidating all previously issued cookies.
SECRET = REPLACE-ME-WITH-GENERATED-RANDOMNESS

# Resources that should never trigger the paywall, e.g.
# logos, stylesheets or favicons.
WHITELIST = ^/(favicon\.ico|assets/.*|robots\.txt)$
The exhaustive list of supported keys (SERVE, PORT,
BIND_TO, UNIXPATH, UNIXPATH_MODE, CONNECTION_LIMIT,
PER_IP_CONNECTION_LIMIT, MAX_REQUEST_SIZE,
REQUEST_BUFFER_MAX, RESPONSE_BUFFER_MAX, UPSTREAM_TIMEOUT,
UPSTREAM_STALL_TIMEOUT, BASE_URL,
DESTINATION_BASE_URL, DESTINATION_UNIXPATH,
MERCHANT_BACKEND_URL, MERCHANT_BACKEND_UNIX_PATH, MERCHANT_ACCESS_TOKEN,
SECRET, WHITELIST, TRUSTED_PROXIES,
TRUSTED_PROXIES6) is documented in paivana.conf(5).
If you reach the merchant backend over a UNIX domain socket on the
same host (recommended for a single-machine deployment), replace
the MERCHANT_BACKEND_URL block with:
MERCHANT_BACKEND_URL = http://localhost/
MERCHANT_BACKEND_UNIX_PATH = /run/taler-merchant/merchant.sock
Note
MERCHANT_ACCESS_TOKEN and SECRET are sensitive values.
Make sure paivana.conf is only readable by the
paivana-httpd user. The Debian package installs the file
accordingly.
When paivana-httpd runs behind a trusted reverse proxy
(Nginx/Apache), pass -f / --respect-forwarded-headers in the
systemd unit’s ExecStart= so the real client address is taken from
the Forwarded and X-Forwarded-For headers. -f is a
statement that the server in front writes those headers itself, so
configure that server accordingly before you pass it; set
TRUSTED_PROXIES / TRUSTED_PROXIES6 as well if there is more
than one proxy in the path. Reverse proxy configuration has the
details and working configurations. See paivana-httpd(1) for the
remaining command-line flags (in particular -g to require only
a single payment per site and -n to disable the paywall for
debugging).
7.2.4.1. Body sizes, buffering and upstream timeouts#
paivana-httpd relays bodies as they arrive rather than assembling
them first. A request or response of any size therefore passes
through, and the client starts receiving the response while the
upstream is still producing it — neither of which was true when each
body had to fit in memory, where anything over 40 MiB failed outright
and nothing reached the client until everything had.
Two consequences are worth knowing before tuning anything.
Memory is bounded by the buffers, not by the content. An
in-flight request can hold at most REQUEST_BUFFER_MAX plus
RESPONSE_BUFFER_MAX (256 KiB each by default), so the ceiling for
the process is that sum times CONNECTION_LIMIT — about 256 MiB at
the shipped defaults. That is a ceiling and not a typical cost: the
buffers are allocated on demand and grown only as far as a request
actually needs, so a page that arrives in one read never occupies more
than that read. Raise the buffers only to trade memory for throughput
on fast links, and lower CONNECTION_LIMIT if you raise them a
lot. When the client cannot keep up, Paivana stops reading
from the upstream; when the upstream cannot keep up, Paivana stops
reading from the client. Neither ever accumulates.
A response can now fail after its status has been sent. Once the
upstream’s headers have gone out they cannot be retracted, so an
upstream that dies mid-body can no longer be reported as 502.
Paivana signals it by breaking the framing instead: a declared
Content-Length is left unmet, or a chunked response is closed
without its terminating chunk. Both are failures a conforming client
must detect (RFC 9112, section 8.1.2) — curl reports exit code
18, for instance — and the event is logged at WARNING naming the
URL and the byte count reached.
Note
There is one case where it cannot be signalled at all: an HTTP/1.0 client receiving a response whose length the upstream never declared. There the close of the connection is the framing, so a truncated body is indistinguishable from a complete one. Nothing at this layer can fix that; it is a property of HTTP/1.0. It does not arise for HTTP/1.1 clients, which get chunked framing, nor for any client when the upstream declares a length.
The two upstream timeouts bound different things and neither bounds the request as a whole:
UPSTREAM_TIMEOUT(60 s) is the time to the response headers. Expiry here yields504, and this is the only one that can still produce a status code.UPSTREAM_STALL_TIMEOUT(60 s) is how long the upstream may move no bytes in either direction. Expiry here truncates the response as described above, if it had started, and yields504if it had not. The clock does not run while Paivana is holding the upstream back because the client has not caught up, so a slow client is never mistaken for a stalled upstream.
Raise UPSTREAM_STALL_TIMEOUT if your upstream legitimately pauses
for long stretches mid-response — a report generator that computes for
minutes between writes, say. Do not raise it to accommodate slow
clients; that is already handled.
7.2.4.2. Starting and stopping the service#
The Debian/Ubuntu package ships a socket-activated systemd unit.
After editing /etc/paivana/paivana.conf enable and start it:
# systemctl enable --now paivana-httpd.socket
# systemctl status paivana-httpd
The socket listens on /run/paivana/httpd/paivana-http.sock with
group www-data, which lets a co-located Nginx or Apache talk to
the daemon without granting it broader filesystem access. Logs are
sent to the journal:
# journalctl -u paivana-httpd -f
7.2.5. Whitelisting unpaid resources#
Most sites contain resources that must remain freely accessible even
to clients that have not paid: the stylesheets, fonts, logos and
scripts referenced by the paywall page itself, a favicon.ico, a
robots.txt, or a health-check endpoint polled by a load balancer.
If these were paywalled, the paywall page could not even render.
The WHITELIST configuration key holds a single POSIX extended
regular expression that is matched against the request path (which
always begins with /). When it matches, the request bypasses both
the paywall and the access-cookie check and is proxied straight to the
upstream:
[paivana]
WHITELIST = ^/(favicon\.ico|robots\.txt|assets/.*|.*\.css|.*\.js)$
A few details worth knowing:
The expression is matched against the URL path only, not against the host or the request method.
The expression must match the path in its entirety.
paivana-httpdanchors it for you — it compiles^(your expression)$, so writing your own^and$is harmless but redundant. What this rules out is a substring match:/assets/on its own whitelists nothing, because no path is exactly that;/assets/.*is what whitelists that subtree. The enclosing group matters for alternations:a|bbehaves as “exactlyaor exactlyb”, not as “starts withaor ends withb”.Anchoring is a safety property, not a convenience. An unanchored whitelist grants free access to every path merely containing the expression, which a client can arrange deliberately: with a substring rule, a request for
/premium/article?x=/robots.txtwould sail past the paywall.Paths longer than 16384 bytes are rejected outright with HTTP
414
URI Too Long
, before any expression is evaluated. The cap bounds the cost of a pathological expression on a path an unpaying client controls; no legitimate URL comes close to it.An invalid regular expression is a fatal configuration error:
paivana-httpdlogs the problem and refuses to start.The internal endpoints
POST /.well-known/paivana(payment callback) andGET /.well-known/paivana/templates/...(paywall pages) are always handled bypaivana-httpditself and are not affected by the whitelist.Running with
-n/--no-paymentwhitelists everything; the daemon then behaves as a transparent reverse proxy and never consults the merchant backend.
Note
Whitelisting is coarse — it is keyed purely on the URL. Per-URL
pricing (charging different amounts for different paths) is done
with merchant templates and their website_regex, described in
Configuring Paivana templates, not with WHITELIST.
7.2.6. Access control: per-page vs. site-wide payment#
Once a client has paid, paivana-httpd issues a cryptographically
protected access cookie (Paivana-Cookie) instead of asking the
merchant backend again on every subsequent request. The cookie is a keyed hash
over (expiration time, website, client address); it carries no
server-side state, so any of the (possibly several) paivana-httpd
processes can validate it.
Two aspects of this are operator-visible:
7.2.6.1. Scope of a payment#
By default a payment grants access to the specific URL that was
paid for: the cookie’s Path is set to that path and the website
is bound into the hash. This is what you want when each page is sold
individually.
Passing -g / --global-payment changes this so that a single
payment unlocks the entire site: the website component is dropped
from the hash and the cookie is issued with Path=/. Use this when
one purchase (or one subscription) should cover everything behind the
proxy, including for the abuse-mitigation use case where you simply
want a paying client to stop hitting the paywall.
7.2.6.2. Binding to the client address#
The cookie is tied to the client’s network address so that it cannot
simply be copied to another machine. When paivana-httpd runs
behind a TLS-terminating reverse proxy, the socket peer is always that
proxy, so every client would appear to share one address. Run the
daemon with -f / --respect-forwarded-headers in that setup so
the real client address is taken from the Forwarded and
X-Forwarded-For headers instead. Only do this behind a proxy that
writes both of those headers itself; a header it merely passes
through is the client’s own, and then the client chooses the address
its cookie is bound to. Reverse proxy configuration has the
configurations that get this right.
Cookie lifetime is derived from the order’s max_pickup_delay;
configure it on the template (max_pickup_duration) to control how
long a paid client may keep accessing the resource before paying
again. Because the cookie is keyed by SECRET, leaving SECRET
unset means a new random key is chosen at every startup and all
outstanding cookies are invalidated on restart.
SECRET is hashed once to derive that key — no salt, no stretching
— so its own entropy is the only thing protecting it. An attacker who
has seen a single Paivana-Cookie can test candidate secrets
offline as fast as it can compute SHA-512, which on ordinary hardware
is billions of guesses per second. Give SECRET at least 128
bits of entropy from a random source; do not invent a passphrase,
and do not ship the placeholder from the sample configuration above.
Generate one with:
# head -c 32 /dev/urandom | base64
Whoever recovers a weak SECRET can mint access cookies for any URL
and any client address, and you will not see it happen: the forged
cookies never touch the merchant backend, so nothing distinguishes
them in your logs from paid traffic.
7.2.7. Redeeming a payment#
The cookie above is handed out at the end of one round-trip that is
worth understanding, because it is the only point at which
paivana-httpd talks to the merchant backend on behalf of a client,
and because its failure modes are what you will see in the logs.
When the paywall page has been told by the merchant backend that its
order was paid, it POSTs the order ID (together with the nonce,
expiration and website it used to construct the payment) to
/.well-known/paivana. paivana-httpd re-derives the session ID
from those values and asks its backend whether that order was really
paid under it, over its own authenticated connection. Nothing the
client says is taken on trust: the order must be paid and not refunded,
its fulfillment URL must be the website being claimed (or, where the
order has none, that website must lie under the configured
BASE_URL), and the requested expiration must not exceed the order’s
max_pickup_time. Only then is the cookie issued.
This query is a long poll bounded at five seconds, and both parts
are deliberate. A client can be a moment ahead of the backend — it may
even be talking to a different backend process than paivana-httpd
is — so waiting briefly admits an honest client that would otherwise be
turned away just after paying. Conversely, the endpoint is
unauthenticated and can be posted to before any payment exists, so that
wait is also the time an attacker can pin a connection for, which is
why it is short rather than generous. The same bound applies to the
outgoing request itself, so a merchant backend that stops responding
cannot hold connections open either.
The status returned to the client tells you which of these happened:
Status |
Meaning |
|---|---|
303 |
Payment confirmed; the |
409 |
The backend says the order was not paid, or it was refunded, or its contract does not cover the claimed website. This is the client’s problem, not yours — a stale replay, or a page that gave up too early. |
410 |
The client asked for access past the order’s
|
404 |
The backend does not know this order at all. |
504 |
The backend did not answer within the bound, or could not be
reached. Check that |
502 |
The backend answered, but with something |
500 |
The backend rejected our credentials. Check
|
A burst of 504s or 500s is therefore an infrastructure problem and a burst of 409s is not, which is the distinction to key any alerting on.
7.2.8. Configuring Paivana templates#
paivana-httpd does not store any per-site pricing or URL-matching rules
itself. Instead, all rules are expressed as merchant templates of type paivana in the merchant backend. When
paivana-httpd starts up it asks the merchant backend for every template
configured for the instance identified by MERCHANT_BACKEND_URL and uses
the website_regex field of each template to decide which template (and
therefore which payment options) applies to an incoming request URL.
The corresponding REST API is documented in detail in the Merchant Backend HTTP API; see in particular the POST /private/templates endpoint and the TemplateContractPaivana definition.
7.2.8.1. Prerequisites#
Before creating a template you need:
a running
taler-merchant-httpd(see the Launching the backend section of the merchant manual);a merchant instance with at least one configured bank account;
the access token of that instance (used as
MERCHANT_ACCESS_TOKENinpaivana.conf).
In the examples below we assume the merchant backend is reachable
at http://localhost:9966/, the default instance is default,
its access token is secret-token:sandbox and the currency is
KUDOS. Adjust the URLs, tokens and amounts to match your
deployment. The
src/backend/test.sh
script that ships with Paivana sets up exactly this minimal
configuration and is a good starting point for experimentation.
7.2.8.2. Creating a single global template#
The simplest Paivana setup uses one template that matches every
URL on the site and charges a fixed price. This is the
configuration created by src/backend/test.sh:
$ curl -X POST http://localhost:9966/private/templates \
    -H 'Authorization: Bearer secret-token:sandbox' \
    -H 'Content-Type: application/json' \
    -d '{
          "template_id": "paivana",
          "template_description": "A Paivana template",
          "template_contract": {
            "template_type": "paivana",
            "summary": "Access to example.com",
            "website_regex": ".*",
            "choices": [ { "amount": "KUDOS:1" } ]
          }
        }'
The template_type must be "paivana": this allows
paivana-httpd to pick the template up at startup and
also enables some required logic in the merchant backend. The
website_regex is a POSIX extended regular expression that is
matched against the request URL; .* covers everything. Each
entry in choices describes one way the client may pay and is an
OrderChoice object (so the paywall can also support
the use of subscription tokens, discount coupons, etc.). The
contract as a whole is the TemplateContractPaivana object
of the merchant backend API, which stores
website_regex but leaves its interpretation to paivana-httpd
— that is, to the rules below.
Two properties of the matching are easy to get wrong, and both make the difference between a template that applies and one that silently never does:
The subject is the absolute URL, not the path. It is the configured
BASE_URL(or the scheme andHostof the request, whenBASE_URLis not set) followed by the path — for examplehttps://example.com/premium/article. An expression written against the path alone, such as/premium/.*, therefore matches nothing.The expression must match that URL in its entirety.
paivana-httpdanchors it for you, compiling^(your expression)$, so a substring rule does not apply to the URLs containing it. Writing your own^and$remains harmless. The enclosing group means an alternation such asa|bis read as “exactlyaor exactlyb”.
So a template meant for one subtree is written either against the
whole URL, https://example\.com/premium/.*, or with a leading
wildcard, .*/premium/.*, if the same template should apply
regardless of the host the site is served under.
A URL longer than 16384 bytes is answered with HTTP 414 URI Too Long
and no template is evaluated for it. The cap bounds the cost of a
pathological expression on a URL an unpaying client controls.
A successful create returns HTTP 204 No Content. After
creating the template, (re)start paivana-httpd so that it
re-reads the template list:
# systemctl restart paivana-httpd
7.2.8.3. Multiple templates with URL-specific pricing#
When a single site contains content with different prices, define one template
per price bucket and use website_regex to scope each template to the
matching URLs. When several templates match the same URL paivana-httpd
picks the first one if finds that matches. Be careful: if multiple templates
match a URL, the result is non-deterministic!
For example, a news site might charge 2 KUDOS for premium articles
and 50 cents (KUDOS:0.5) for standard articles:
$ curl -X POST http://localhost:9966/private/templates \
    -H 'Authorization: Bearer secret-token:sandbox' \
    -H 'Content-Type: application/json' \
    -d '{
          "template_id": "premium",
          "template_description": "Premium long-form articles",
          "template_contract": {
            "template_type": "paivana",
            "summary": "Premium article on example.com",
            "website_regex": ".*/premium/.*",
            "choices": [ { "amount": "KUDOS:2" } ]
          }
        }'

$ curl -X POST http://localhost:9966/private/templates \
    -H 'Authorization: Bearer secret-token:sandbox' \
    -H 'Content-Type: application/json' \
    -d '{
          "template_id": "default",
          "template_description": "Standard articles",
          "template_contract": {
            "template_type": "paivana",
            "summary": "Standard article on example.com",
            "website_regex": ".*/standard/.*",
            "choices": [ { "amount": "KUDOS:0.5" } ]
          }
        }'
7.2.8.4. Offering multiple payment options#
The choices array lets a single template offer several mutually exclusive
ways to pay. A common pattern is to accept either a cash payment or to sell a
subscription; the wallet shows both options and the customer picks one. The
third option, where the customer already has a subscription, will be used
automatically by the wallet for subscribers and the customer will not even
have to click to bypass the paywall as a subscriber. See the merchant manual
for the details of OrderChoice objects.
$ curl -X POST http://localhost:9966/private/templates \
    -H 'Authorization: Bearer secret-token:sandbox' \
    -H 'Content-Type: application/json' \
    -d '{
          "template_id": "article",
          "template_description": "Single article, paid or via subscription",
          "template_contract": {
            "template_type": "paivana",
            "summary": "Article on example.com",
            "website_regex": ".*",
            "choices": [
              { "amount": "KUDOS:1",
                "description": "Pay per article" },
              { "amount": "KUDOS:100",
                "description": "Buy subscription",
                "outputs": [ { "token": "monthly-subscription" } ] },
              { "amount": "KUDOS:0",
                "description": "Use my subscription",
                "inputs": [ { "token": "monthly-subscription" } ],
                "outputs": [ { "token": "monthly-subscription" } ] }
            ]
          }
        }'
7.2.8.5. Managing templates#
Templates can be listed, updated and deleted through the merchant
backend’s REST API or through the merchant backend SPA at
$MERCHANT_BACKEND_URL/. See the merchant manual section on
templates for details, and the API reference for
the relevant endpoints:
GET /private/templates — list all templates of the instance;
PATCH /private/templates/$TEMPLATE_ID — update a template;
DELETE /private/templates/$TEMPLATE_ID — remove a template.
After any change, restart paivana-httpd so the new template
list takes effect.
7.2.9. Customizing the paywall page#
The merchant templates of the previous section decide which URLs
cost how much. This section is about the look of the page an
unpaid visitor sees — the HTML the daemon returns with the
402 Payment Required status.
7.2.9.1. How the page is rendered#
The paywall body is produced from a Mustache template named paywall that
paivana-httpd loads, via libtalertemplating, from
$PREFIX/share/paivana/templates/
Templates are language-specific: the file is named
paywall.$LANG.must and the daemon picks a variant based on the
client’s Accept-Language header. The package ships an English
default, paywall.en.must. To offer the paywall in additional
languages, drop further paywall.<lang>.must files into the same
directory. Rendered responses are cached per language and per
content-encoding (and carry Cache-Control: public and a matching
Vary header), which is what lets the paywall be served as a
scalable, mostly-static page even under load.
When rendering, paivana-httpd passes the following values into the
template:
Variable |
Meaning |
|---|---|
|
Base URL of the merchant backend (the page long-polls it for payment completion). |
|
ID of the matched merchant template. |
|
Human-readable summary from the template, if any. |
|
Array of payment options (OrderChoice). |
|
True if more than one payment option exists. |
|
The first entry of |
|
Seconds the order may be picked up within. |
The shipped page uses these to draw a taler:// QR code and a
“Pay now” link, long-poll the backend, and reload the original URL
once the wallet confirms. The non-visual integration point — useful
for automated and agentic clients — is the Paivana: HTTP response
header, which carries the taler://pay-template/... URI directly, so
a client need not parse the HTML to find out how to pay.
7.2.9.2. Editing the appearance#
For small tweaks — colours, wording, your logo, a link back to your
site — you can edit the installed paywall.en.must directly; it is
ordinary HTML/CSS with Mustache {{ ... }} placeholders for the
variables above. Keep the <script> block intact: it is what
performs the long-poll and the post-payment reload.
The shipped paywall.en.must is in fact generated at build time
from a Jinja2 source, src/frontend/paywall.en.must.j2, which inlines
the client-side logic from src/frontend/paywall.js and a bundled QR
library. (To avoid clashing with Mustache’s {{ }}, the Jinja2
source uses @@ ... @@ and @< ... >@ delimiters.) If you want to
change the JavaScript behaviour rather than just the styling, edit the
.j2 source and rebuild — the Meson custom_target regenerates the
.must file and installs it into the templates directory shown
above.
7.2.10. Reverse proxy configuration#
paivana-httpd itself speaks plain HTTP on a UNIX socket (or a
local TCP port). In production it is often run behind an Internet-facing
reverse proxy that terminates TLS and forwards requests to the
Paivana socket. This section gives minimal working examples for
both Nginx and Apache. The same approach is used for the merchant
backend; see the merchant manual’s
Reverse proxy configuration section for additional
discussion.
The examples assume the public domain is example.com,
that paivana-httpd is socket-activated by the shipped
paivana-httpd.socket unit (so its listening socket lives at
/run/paivana/httpd/paivana-http.sock) and that TLS termination
happens at the reverse proxy.
In this setup paivana-httpd has to run with -f /
--respect-forwarded-headers: a UNIX-domain peer has no address of
its own, so without -f there is no client address at all, the
access cookie cannot be bound to one, and
POST /.well-known/paivana fails. What -f means, though, is
that the client address becomes whatever the forwarding headers say it
is — and that address is what the cookie is bound to and what every
address-based decision uses. So it is worth being precise about which
part of those headers is believed.
paivana-httpd reads the chain from the right. The rightmost
element was written by the peer it accepted the connection from, which
-f asserts is a proxy of yours; every step further leftwards is
hearsay written by the node to its right, and is permitted only if
that node is listed in TRUSTED_PROXIES / TRUSTED_PROXIES6.
With no such list configured the walk stops on its first step: trust
extends exactly one hop, and the element the front server itself wrote
is the client. Anything a client prepends to the header sits to the
left of that and can never be promoted.
The failure mode is therefore not a client that prepends, but a header
the front server never writes at all — because then the rightmost
element is the client’s own, and it is believed. Both Nginx and
Apache forward a request header they were not told to touch, and
neither generates an RFC 7239 Forwarded header on its own.
paivana-httpd prefers Forwarded over X-Forwarded-For
where both are present, so a front server that carefully sets
X-Forwarded-For and ignores Forwarded is still handing every
client its choice of address: the client sends one Forwarded
element, that element is the whole chain, it is the rightmost, and it
wins over everything the proxy set. A paid cookie is then worth
nothing, since anyone can present the address it was issued to.
Deal with both headers, on every request. Whether you overwrite
or append matters less than that you write: appending — Nginx’s
$proxy_add_x_forwarded_for, Apache’s ProxyAddHeaders — also
puts the real peer rightmost and is what you want when your own proxy
sits behind another one. At the outermost hop there is nothing to
preserve, so the configurations below simply set.
They are the ones shipped with the Debian package, with TLS termination added; their comments explain each choice.
The package installs this at
/etc/nginx/sites-available/paivana. Adapt server_name
and the certificate paths, then enable it via ln -s
../sites-available/paivana /etc/nginx/sites-enabled/ and
reload Nginx (systemctl reload nginx).
# RFC 7239 node identifier for the peer we accepted from.  nginx has
# no built-in variable for this: an IPv6 address has to be bracketed
# and therefore quoted (RFC 7239 §6), and a peer with no address is
# "unknown" (§6.3).
map $remote_addr $paivana_forwarded_elem {
  ~^[0-9.]+$        "for=$remote_addr";
  ~^[0-9A-Fa-f:.]+$ "for=\"[$remote_addr]\"";
  default           "for=unknown";
}

server {
  listen 443 ssl;
  listen [::]:443 ssl;
  server_name example.com;

  ssl_certificate     /etc/letsencrypt/live/example.com/fullchain.pem;
  ssl_certificate_key /etc/letsencrypt/live/example.com/privkey.pem;

  location / {
    proxy_pass http://unix:/run/paivana/httpd/paivana-http.sock;
    proxy_redirect off;
    proxy_set_header Host $host;

    # paivana-httpd is started with -f (see paivana-httpd.service), so
    # it takes the client address for the access cookie from the
    # headers set here.  What makes that sound is that we set every
    # one of them: paivana-httpd reads the chain from the right, so
    # the element that counts is the last one written -- ours.  A
    # header we do not set is forwarded as the client sent it, and
    # then the element that counts is the client's own.
    #
    # $remote_addr rather than $proxy_add_x_forwarded_for because
    # this is the outermost hop: the peer we accepted from IS the
    # client, and there is no earlier chain worth preserving.  If
    # this nginx is itself behind another proxy, switch to
    # $proxy_add_x_forwarded_for -- appending is equally sound, the
    # peer still ends up rightmost -- and list that hop in
    # TRUSTED_PROXIES so paivana-httpd may step over it.
    proxy_set_header X-Forwarded-For   $remote_addr;
    proxy_set_header X-Forwarded-Proto $scheme;
    proxy_set_header X-Forwarded-Host  $host;
    proxy_set_header X-Forwarded-Port  $server_port;

    # RFC 7239.  paivana-httpd PREFERS this over the X-Forwarded-*
    # headers above, which are kept for origins that only speak those.
    # Setting it is not optional: nginx neither generates a Forwarded
    # header nor strips the client's, so without this line a client
    # can send one element of its own, have it be the whole chain,
    # and outrank everything set above.  Behind another proxy,
    # replace this with the appending form from nginx.org's "Using
    # the Forwarded header", which validates $http_forwarded before
    # extending it.
    proxy_set_header Forwarded "$paivana_forwarded_elem;proto=$scheme;host=$host";
  }
}

server {
  listen 80;
  listen [::]:80;
  server_name example.com;
  return 301 https://$host$request_uri;
}
Enable the required modules once:
# a2enmod proxy proxy_http headers ssl
# systemctl reload apache2
The package installs the <Location> block below at
/etc/apache2/sites-available/paivana.conf; it is shown here
inside a TLS-terminating virtual host. Enable it with
a2ensite paivana and reload Apache.
<VirtualHost *:80>
    ServerName example.com
    Redirect permanent / https://example.com/
</VirtualHost>

<VirtualHost *:443>
    ServerName example.com

    SSLEngine on
    SSLCertificateFile      /etc/letsencrypt/live/example.com/fullchain.pem
    SSLCertificateKeyFile   /etc/letsencrypt/live/example.com/privkey.pem

    <Location "/">
    # paivana-httpd is started with -f (see paivana-httpd.service), so it
    # takes the client address for the access cookie from the forwarding
    # headers, reading the chain from the right.  mod_proxy's
    # ProxyAddHeaders (on by default) appends the real client to
    # X-Forwarded-For, which puts it rightmost -- but mod_proxy does not
    # touch Forwarded, and paivana-httpd prefers Forwarded.  A
    # client-supplied one would arrive whole and be believed.  Drop the
    # client's copies of all of them first, so that only what Apache and
    # the line below produce reaches paivana-httpd.
    #
    # If this Apache is itself behind another proxy, remove these and
    # configure mod_remoteip (RemoteIPHeader / RemoteIPInternalProxy) for
    # that hop instead, listing it in TRUSTED_PROXIES.
    RequestHeader unset X-Forwarded-For
    RequestHeader unset X-Forwarded-Proto
    RequestHeader unset X-Forwarded-Host
    RequestHeader unset X-Forwarded-Port
    RequestHeader unset Forwarded

    # RFC 7239, which paivana-httpd prefers over the X-Forwarded-* headers
    # mod_proxy adds.  Apache emits no Forwarded of its own, so build the
    # element here.  It must be the "expr=" form: mod_headers' %{NAME}e
    # reads subprocess_env, which is still empty when RequestHeader runs,
    # so the %{REMOTE_ADDR}e spelling silently yields "for=(null)".  That
    # is not a weaker paywall but a dead one -- an element naming no
    # address sends paivana-httpd back to the socket peer, which over a
    # UNIX socket is no address at all, and no cookie can be issued.
    # Note that %{REMOTE_ADDR} yields an unbracketed IPv6 address where
    # RFC 7239 §6 asks for for="[...]"; paivana-httpd accepts both.
    RequestHeader set Forwarded "expr=for=%{REMOTE_ADDR};proto=%{REQUEST_SCHEME};host=%{HTTP_HOST}"

    ProxyPass        "unix:/run/paivana/httpd/paivana-http.sock|http://example.com/"
    ProxyPassReverse "unix:/run/paivana/httpd/paivana-http.sock|http://example.com/"
    </Location>
</VirtualHost>
There is deliberately no RequestHeader set X-Forwarded-Proto
here. mod_proxy does not add that header itself, and the
scheme paivana-httpd uses comes from the proto=
parameter of the Forwarded element built above, which it
prefers anyway.
Neither configuration needs TRUSTED_PROXIES to be safe — with one
proxy in front, the one hop of trust that -f grants is exactly the
hop there is. TRUSTED_PROXIES and TRUSTED_PROXIES6 are what
you need when the chain is longer than that: a CDN or a load
balancer in front of your Nginx, whose element your Nginx appends to.
Listing those hops is what permits the walk to keep stepping leftwards
past them and reach the client that is genuinely at the far end:
[paivana]
TRUSTED_PROXIES  = 10.0.0.0/8;192.168.0.0/16;
TRUSTED_PROXIES6 = 2001:db8::/32;
The walk still stops at the first element written by a node you did
not list, so a client that prepends entries of its own gains nothing
by it however long the list gets. Listing too much is the real risk:
every network you add is a network whose members may name any client
address they like. Keep the list to the proxies you operate, and note
that a UNIX-domain peer needs no entry at all — it has no address to
match, is by construction on this host, and access to it is governed
by UNIXPATH_MODE. The syntax has sharp edges (entries are
terminated as well as separated by ;, and TRUSTED_PROXIES6
tolerates no spaces); paivana.conf(5) documents them.
One thing the walk does not cover, and the reason the front server’s
configuration still matters after you have set all this: -f also
lets the forwarding headers supply the scheme and authority that
paivana-httpd builds its own URLs from, when BASE_URL is not
set. Those are read as the leftmost proto= / host= (or
X-Forwarded-Proto / -Host / -Port) value, which is not the
element the trusted-proxy walk selects and is not vetted against it.
Setting BASE_URL to your public HTTPS URL closes that off entirely
and is worth doing whether or not you also list your proxies.
Conversely, do not pass -f to a paivana-httpd that clients can
reach directly. There it is the client, not a proxy, that is setting
those headers, and -f is the assertion that this is not so.
If you operate both Paivana and the merchant backend on the same
host, you typically expose them under two different hostnames (e.g.
example.com and backend.example.com); the merchant
backend must never be proxied through paivana-httpd, only
the upstream content service should be.
7.2.11. Verifying the setup#
After completing the steps above, a quick smoke test is to request
a paywalled URL with curl:
$ curl -i https://example.com/some-article
An unpaid request will first redirect (302 Found) to the static
paywall page at /.well-known/paivana/templates/{id}#{base64_website}
which will then return a HTTP/1.1 402 Payment Required together
with a Taler-formatted paywall body containing the taler://pay/... URI of
the freshly created order. Paying that order with any GNU Taler wallet (see
the Wallet documentation) and
re-requesting the URL from the same client should then yield the upstream
content unchanged. If the page is run in a browser, the client-side
JavaScript should automatically trigger the required reload of the page after
the wallet made the payment.
For interactive debugging, paivana-httpd -n disables the
paywall and turns the daemon into a transparent reverse proxy;
this is useful to confirm that the network plumbing to the
upstream service works before involving the merchant backend.
See paivana-httpd(1) for the other runtime flags.
7.3. Drupal integration#
This chapter documents the installation and operation of the
taler_turnstile Drupal module. The module gates individual
nodes (articles, pages, …) of a Drupal 9 or 10 site behind a
GNU Taler paywall: visitors who have not yet paid are shown a
teaser plus a payment button, and once their wallet has paid the
associated merchant template the full content is unlocked.
The module is designed around the same Paivana-style flow as paivana-httpd: a static, cacheable paywall page references a payment template in the merchant backend, no order is created when a visitor merely loads a paywalled article, and no PHP session is started for unauthenticated traffic. This keeps bot traffic from polluting the merchant backend and lets Drupal’s page caches serve the paywall page to anonymous visitors without per-request work.
7.3.1. Architecture overview#
A Drupal site using Turnstile combines three independent components:
The Drupal site. An ordinary Drupal 9 or 10 installation serving content of one or more content types (
article,page, …). Thetaler_turnstilemodule adds an entity-reference field called Price category to the content types you select, and useshook_entity_view_alter()to intercept rendering of nodes that carry a non-empty value.A GNU Taler merchant backend (
taler-merchant-httpd). The backend stores one payment template per price category defined in Drupal, manages orders, talks to one or more Taler exchanges, and ultimately reports back whether a given order has been paid. See the Taler Merchant Backend Operator Manual for full details.The visitor’s GNU Taler wallet. The wallet scans the QR code shown on the paywall page (or follows the
taler://pay-template/…link), pays the merchant template and triggers the unlock.
Turnstile itself stores no per-visitor state in the Drupal
database; once the merchant backend confirms a payment, Turnstile
mints a short-lived HMAC cookie (taler_turnstile_paivana)
that the browser presents on subsequent requests to the same
fulfillment URL. Clearing cookies forgets paid access, but
GNU Taler wallet’s repurchase detection will restore the cookie
if the user attempts to pay for the same article again.
Note
This feature likely does not interact well with expiration periods for article purchases. This is a bug that will require further work to fully address. See #11443.
7.3.2. Installation#
7.3.2.1. Requirements#
Drupal 9 or 10
PHP 8.1 or later (the module uses native enums)
The Drupal core modules
node,field,userandpath_alias(the latter is used by the confirmation endpoint to map fulfillment URLs back to nodes)A reachable GNU Taler merchant backend supporting the v29 (or newer)
paivanatemplate type and the public/sessions/$SESSION_IDendpointAn access token for the merchant instance with the
templates-writeandorders-readpermissions
7.3.2.2. Obtaining the module#
The module sources are available from the GNU Taler Git repository as well as
Drupal’s own module repository. Download the latest release and extract it
into your Drupal installation’s modules/custom/ directory so that the
resulting layout is:
$ ls modules/custom/taler_turnstile/
config/   js/        taler_turnstile.info.yml
src/      templates/ taler_turnstile.module
...
There is no build step and no Composer package: the module is plain PHP and a couple of JavaScript files (the QR code library is vendored from davidshimjs/qrcodejs).
7.3.2.3. Enabling the module#
The module can be enabled via Drush or via the Drupal admin interface:
$ drush en taler_turnstile
$ drush cr
Navigate to /admin/modules, locate GNU Taler Turnstile
in the System package, tick its checkbox and press
Install.
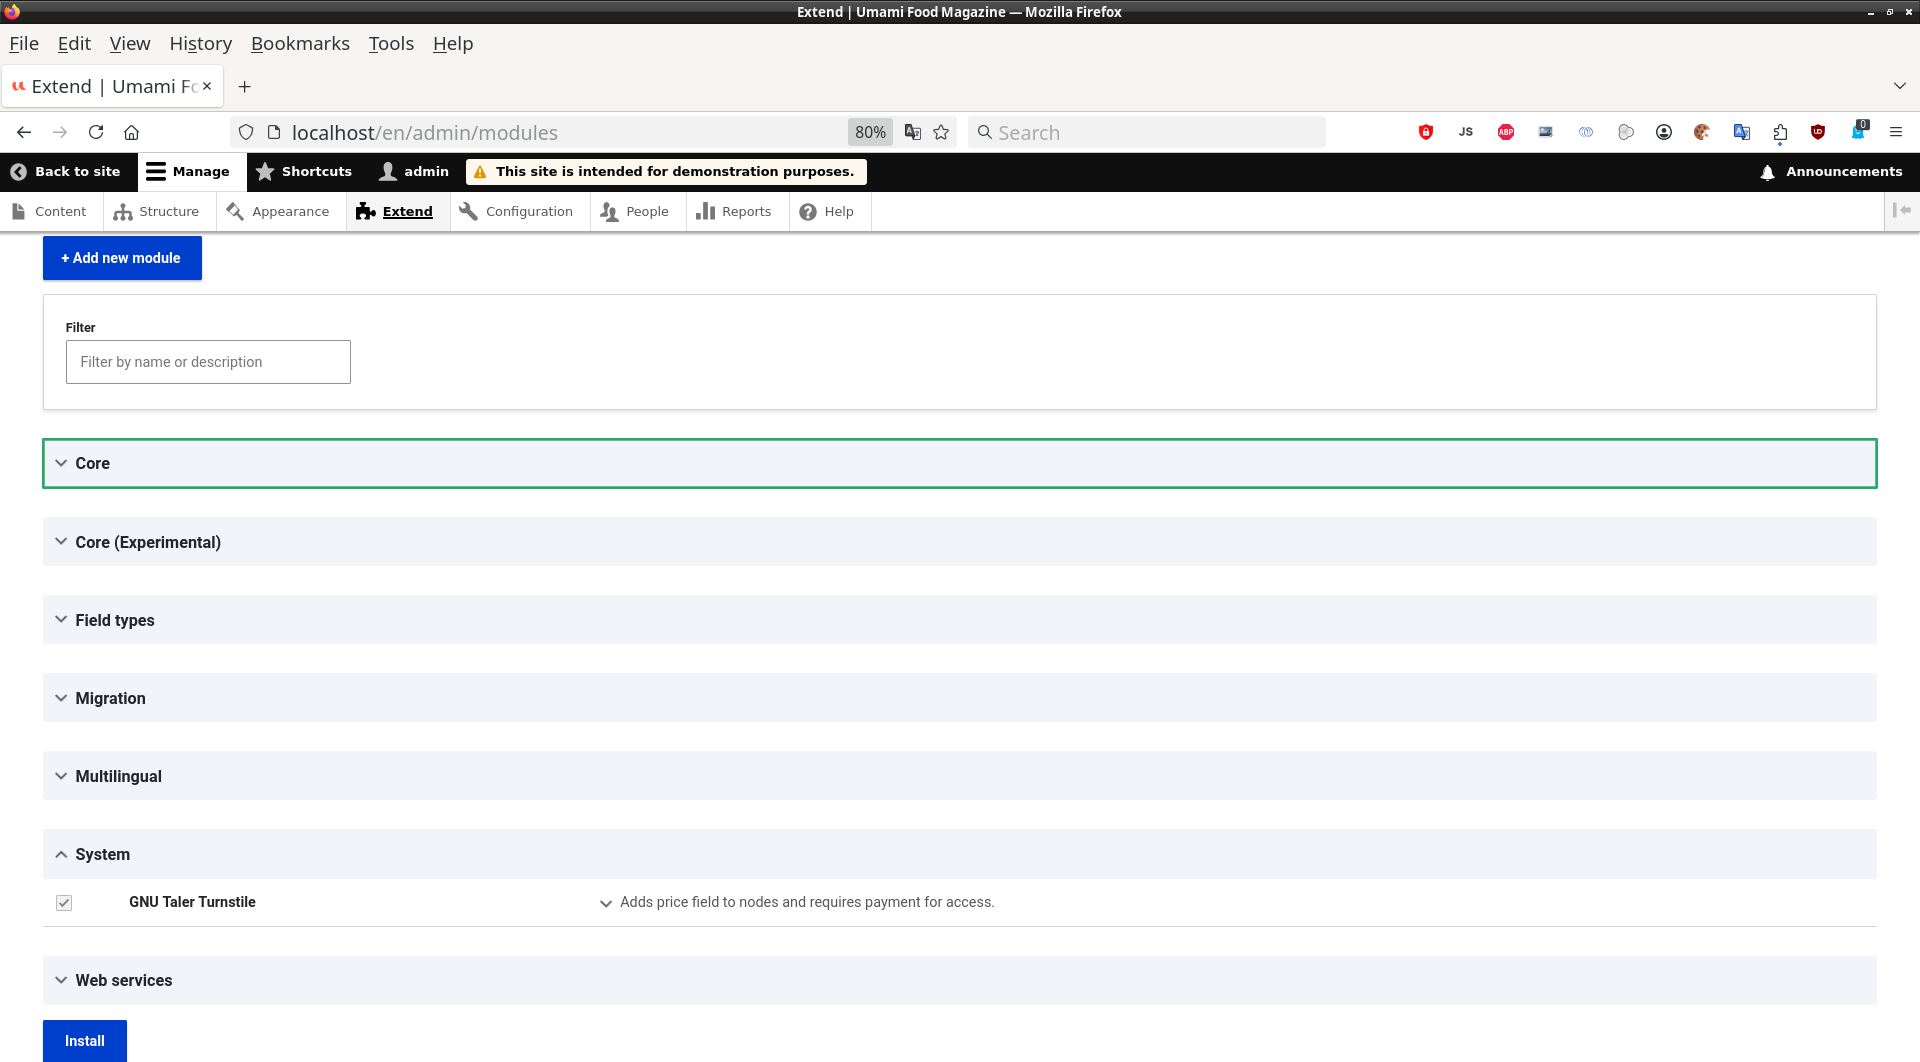
After installation, clear the cache so that Drupal picks
up the new routes, services and theme template
(drush cr or Configuration → Performance →
Clear all caches).
Enabling the module triggers hook_install(), which attaches the
field_taler_turnstile_prcat entity-reference field to every content type
listed in enabled_content_types (default: article).
Uninstalling with drush pmu taler_turnstile removes the
price-category field from every configured content type and
deletes the module’s configuration. It does not delete
templates from the merchant backend; remove those manually if
desired (see Templates).
7.3.3. Configuring the basics#
The main settings page lives at
/admin/config/system/taler-turnstile and is also reachable
through Configuration → System → GNU Taler Turnstile basics.
It collects the four pieces of information Turnstile needs to
talk to the merchant backend and to know which content to gate:

The fields are:
Enabled content types — a list of checkboxes derived from the site’s configured node bundles. Each ticked content type gains the Price category field (and gets it removed again when unticked). The change takes effect immediately on save: the field is created or destroyed as a side-effect of saving this form, not via
drush cim.Payment backend URL — the HTTP(S) base URL of the merchant backend. Instance-specific URLs ending in
/instances/$ID/are accepted; the URL must end with a trailing slash. When you save the form with a non-empty value, Turnstile contacts the backend’s/configendpoint to verify reachability before accepting the value.Access token — the Bearer token used for every call to the backend. It must begin with
secret-token:(following RFC 8959, see Access control in the merchant manual). When both URL and token are present, the form performs a live authentication check against the backend and an error is shown if the access token is incorrect.Disable Turnstile when payment backend is unavailable (fail-open toggle, on by default) — when the merchant backend cannot be reached, this controls whether visitors see the unpaywalled article (toggle on) or an error message in place of the payment button (toggle off). The settings form refuses to save with the toggle off and an empty backend URL or token unless you confirm the warning, so a misconfiguration cannot silently break the live site.
The first time you save a working backend URL and access token,
Turnstile pushes a paivana-style template to the merchant
backend for every price category that already exists. Each
template carries the ID turnstile-{category_id}. You do not
need to create those templates by hand, and you do not need to
visit the merchant backend’s SPA to manage them — Turnstile keeps
them in sync as you edit the categories (see
Defining price categories below).
Before continuing, make sure that the merchant backend instance itself is ready to take payments:
The instance has at least one configured bank account.
Any legitimization required by the chosen payment service provider has been completed.
7.3.4. Configuring subscription prices#
Note
The term subscription is slightly misleading, as it is not auto-renewing. We are in the process of renaming this to passes which is clearer. However, the current module uses subscription and thus so does this manual.
Turnstile supports the GNU Taler subscription model, in which a
visitor buys a subscription token once and the token is then
consumed to unlock individual articles for some validity period.
The catalogue of available token families is configured on the
merchant backend (see the merchant manual section on
templates and the wider Taler concept of
subscription tokens); Turnstile reads the catalogue live from
private/tokenfamilies and asks you to set the
purchase price per token family per currency.
Navigate to
/admin/config/system/taler_turnstile/subscription-prices
(also reachable as Configuration → System → GNU Taler Turnstile
subscription prices). The form lists one collapsible Details
block per token family advertised by the backend, with one
numeric input per supported currency:

Leaving a field empty disables the Buy subscription in {currency} payment choice for that combination — the subscription will then not be offered for sale in that currency.
If the merchant backend has no token families configured, the form shows a warning and offers nothing to edit. In that case you can still operate Turnstile in pure pay-per-article mode; simply skip this configuration step.
Whenever this form is saved, Turnstile republishes every price-category template against the backend so the new subscription prices appear in the wallet’s Buy subscription choices immediately.
Note
GNU Taler token families offer more flexible payment options, not just subscriptions. However, only subscriptions are supported at this time.
7.3.5. Defining price categories#
A price category is a named bucket of payment options that can
be attached to nodes. Categories are managed at
/admin/structure/taler-turnstile-price-categories (also
reachable as Structure → GNU Taler Turnstile price
categories). The collection page lists the existing categories
together with their machine names and descriptions and offers
Edit, Delete and Add price category actions:

7.3.5.1. Creating or editing a price category#
Click Add price category (or Edit on an existing row) to reach the price-category form. The form has three sections:
Name — human-readable label for the category (e.g. Standard article, Long-form feature). Shown to editors when they pick a category on a node form.
Machine name — the slug used to build the merchant template ID (
turnstile-{machine_name}). Derived automatically from the initial Name; fixed once the category exists.Description — free text shown to editors in the node form to help them pick the right category.
Prices — a fieldset with one collapsible Details block per known token family plus a special block labelled
No reductionthat holds the price for non-subscribers. Each block contains one numeric input per supported currency.

Pricing semantics:
A value in the
No reductionblock sets the per-article price for visitors without a subscription in that currency. Leave it empty to make the article available only to subscribers in that currency.A value in a subscription block sets the discounted price for holders of that subscription token in that currency. A value of exactly
0marks the article as fully covered by that subscription — subscribers see it for free. An empty field means “this subscription does not unlock articles of this category in this currency”, forcing subscribers (with this type of subscription) to pay the full per-article price.
At least one price (across all blocks and currencies) must be set; otherwise the form refuses to save as there would be no way to purchase articles in that price category otherwise.
Saving the form publishes the category as a
paivana-style template to the merchant backend (the v1
choices array is built from the price grid; see
TemplateContractPaivana in the
Merchant Backend HTTP API). If the local
save succeeds but the backend push fails (network error, 401,
…), the form surfaces an error message.
Note
In this case, the local price in Drupal and the merchant template may have drifted out of sync. Visitors would still pay the price in the merchant backend, so this error should always be investigated.
Editing a category, renaming it, or changing prices automatically refreshes the matching merchant template. Deleting a category removes its template; if the delete on the backend fails, you are warned to clean it up manually.
7.3.6. Gating individual nodes#
Once a content type is enabled in the basic settings (see above) and at least one price category exists, every node of that content type gains a new Price category field in its editing form. By default the field is placed in the meta group on the right-hand side of the node form.

To paywall a node:
Edit or create a node of an enabled content type.
Pick a price category in the Price category field.
Save the node.
Leaving the field empty leaves the node freely accessible — the paywall logic only fires for nodes that reference a category.
If you want to remove the paywall from a node, edit it and clear the field. If you want to lift the paywall from an entire content type, untick it in the Enabled content types list on the settings form; the field and its values are then removed. (The field’s contents are dropped, so re-enabling the content type later starts from a clean slate, forcing you to set the price categories again for all nodes in that category.)
7.3.7. The visitor experience#
7.3.7.1. Anonymous visitor without a cookie#
For a node that references a price category, an anonymous
visitor without a valid taler_turnstile_paivana cookie sees:
The node rendered in its teaser view mode. A soft fade-out is applied at the bottom of the teaser so it is visually clear that there is more content behind the paywall.
A Payment required block immediately below the teaser, with a QR code (encoding the
taler://pay-template/…URI for the matching merchant template), a Scan with your GNU Taler wallet hint, and — when the browser advertises support for thetalerURI scheme — an Open GNU Taler payment Web page button.A pricing summary showing the per-article price (or “Not sold individually” if only subscriptions unlock the category) and the list of subscriptions that accept this category.
A Waiting for payment… status line that updates once the wallet picks up the order.

The page is identical for every visitor without the cookie, so
Drupal’s page cache serves it without per-request work. The
taler://pay-template/… URI is also advertised as a
Paivana: HTTP header for non-JavaScript Taler clients.
Behind the scenes, the JavaScript on the page does not
create an order in the merchant backend. It generates a fresh
nonce, derives a session ID from it, renders the QR code, and
long-polls the public sessions/{paivana_id} endpoint on the
merchant backend waiting for the wallet to pick the template up
and pay. No order, no PHP session and no database write happens
until the visitor’s wallet actually engages with the template.
7.3.7.2. Paying#
The visitor scans the QR code with a GNU Taler wallet (or clicks the Open GNU Taler payment Web page button when running a browser with a wallet extension). The wallet shows the available payment choices — for a typical category these are:
Pay in {currency} — the per-article price for non-subscribers.
Pay in {currency} with subscription — only offered to visitors whose wallet holds a matching, unspent subscription token (in which case it usually costs
{currency}:0).Buy subscription in {currency} — pays the per-article price plus the subscription’s purchase price (from Configuring subscription prices above) and yields a fresh subscription token in the visitor’s wallet.
The visitor picks an option, the wallet pays, and Drupal’s JavaScript proceeds to the confirmation step.
7.3.7.3. Confirmation and unlock#
Once the merchant backend reports the order as paid, the
JavaScript POSTs {order_id, nonce, cur_time, website} to
/taler-turnstile/paivana. The Drupal-side controller
re-derives the session ID, fetches the order from the merchant
backend and verifies that the paid contract’s
``fulfillment_url`` matches the requesting page and that the
paid amount is one of the amounts the price category accepts.
Only then does it mint the taler_turnstile_paivana cookie
and 303-redirect the browser back to the article.
Note
The field named cur_time here is not a current time: it is
the expiration of the access being bought, which is why it is
also one of the inputs hashed into the paivana_id.
paivana-httpd and
DD 76 have renamed
it to expiration for exactly that reason. TODO: rename
it here too, in the module’s JavaScript and controller and then
in this manual; until the module changes, this document
deliberately keeps the old name so that it matches the code that
is shipped.
The cookie is keyed on Drupal’s per-site private_key, bound
to the visitor’s client IP and to the specific fulfillment URL,
marked HttpOnly, SameSite=Lax, and Secure when the
page was served over HTTPS. It is valid for 24 hours (the
ORDER_VALIDITY_SECONDS constant in the API service; this
will follow the merchant-supplied
pay_deadline/max_pickup_time once backend v1.6 lands).
The cookie covers exactly one fulfillment URL — clearing
cookies forgets paid access, and access to a different
paywalled article requires a fresh payment (or a valid
subscription).
Note
ORDER_VALIDITY_SECONDS should probably be made configurable in the future, as should the restriction of the client to a particular IP address, as that may or may not be desired. See #11444.
7.3.7.4. Subscriptions in action#
When a paid contract bought a subscription token, Turnstile also stores the token family slug and the token’s expiration time in the visitor’s PHP session. Subsequent requests to other articles whose price category is fully covered by the same subscription short-circuit the paywall entirely: the visitor never sees the Payment required block again until the token expires.
Visitors without a session cookie still see the paywall page (so anonymous, cache-friendly traffic stays cacheable).
7.3.8. Operational notes#
7.3.8.1. Logging#
The module logs to the dedicated taler-turnstile channel.
To watch the live event stream while debugging:
$ drush watchdog:tail --type=taler-turnstile
Levels are used meaningfully: debug for flow tracing,
info for expected skips (for example, a subscription slug
the backend no longer advertises), warning for user-fixable
configuration issues, and error for protocol violations or
unexpected HTTP statuses from the backend.
7.3.8.2. Cache management#
The module declares cookies:taler_turnstile_paivana as a
cache context on every paywalled response, so Drupal’s internal
page cache and dynamic_page_cache separate visitors with a
cookie from those without. A reverse-proxy cache in front of
Drupal must therefore honour the Vary: Cookie header to
avoid handing one paying visitor’s full-content response to
another visitor.
7.3.8.3. Configuration import/export#
Both taler_turnstile.settings and each
taler_turnstile_price_category.* config entity participate in
the normal Drupal drush cex / drush cim workflow.
Importing a configuration change that adds or removes content
types from enabled_content_types triggers field
add/removal; importing a price-category change republishes the
matching merchant template.
7.3.8.4. Permissions#
Two permissions are exposed:
Administer GNU Taler Turnstile — grants access to the basics and subscription prices settings forms.
Administer price categories — grants access to the price-category CRUD pages.
Both default to restrict access and should normally only be granted to trusted administrators.
7.4. Wordpress integration#
Note
This chapter is still early work in progress.
This chapter documents the installation and operation of the
taler-turnstile Wordpress plugin. The plugin gates individual Wordpress
posts (and any other selected public post type) behind a GNU Taler paywall:
visitors who have not yet paid are shown a teaser plus a payment widget, and
once their wallet has paid the associated merchant template the full post
content is unlocked.
Like its Drupal counterpart, the plugin is built around the same Paivana-style flow as paivana-httpd: a static, cacheable paywall page references a payment template in the merchant backend, no order is created when a visitor merely loads a paywalled article, and no PHP session is started for unauthenticated traffic. This keeps bot traffic from polluting the merchant backend and lets Wordpress’ page cache (or any reverse-proxy cache in front of it) serve the paywall page to anonymous visitors without per-request work.
7.4.1. Architecture overview#
A Wordpress site using Turnstile combines three independent components:
The Wordpress site. An ordinary Wordpress 6.3+ installation serving one or more public post types (
post,page, custom post types, …). Thetaler-turnstileplugin adds a Price Category meta field (stored as the post meta key_taler_price_category) to the post types you select, and hooksthe_contentandtemplate_redirectto intercept rendering of posts that carry a non-empty value.A GNU Taler merchant backend (
taler-merchant-httpd). The backend stores one payment template per price category defined in Wordpress, manages orders, talks to one or more Taler exchanges, and ultimately reports back whether a given order has been paid. See the Taler Merchant Backend Operator Manual for full details.The visitor’s GNU Taler wallet. The wallet scans the QR code shown on the paywall page (or follows the
taler://pay-template/…link), pays the merchant template and triggers the unlock.
Turnstile itself stores no per-visitor state in the Wordpress database; once
the merchant backend confirms a payment, Turnstile mints a short-lived HMAC
cookie (taler_turnstile_paivana, keyed by Wordpress’ built-in
wp_salt('auth')) that the browser presents on subsequent requests to the
same fulfillment URL. Clearing cookies forgets paid access, but GNU Taler
wallet’s repurchase detection will restore the cookie if the user attempts to
pay for the same article again.
Note
This feature likely does not interact well with expiration periods for article purchases. This is a bug that will require further work to fully address. See #11443.
7.4.2. Installation#
7.4.2.1. Requirements#
Wordpress 6.3 or later
PHP 8.0 or later
Pretty permalinks must be enabled. With the default plain permalinks (
?p=123) every post is served from path/, which means the path-scoped access cookie cannot be isolated per article; the plugin therefore refuses to paywall posts in that configuration and shows an admin notice on the settings pages until pretty permalinks are turned on under Settings → Permalinks.A reachable GNU Taler merchant backend supporting the v29 (or newer)
paivanatemplate type and the public/sessions/$SESSION_IDendpointAn access token for the merchant instance with the
templates-writeandorders-readpermissions
7.4.2.2. Obtaining the plugin#
The plugin sources are available from the GNU Taler Git repository as well as
Wordpress’ own plugin directory. Download the latest release and extract it
into your Wordpress installation’s wp-content/plugins/ directory so that
the resulting layout is:
$ ls wp-content/plugins/taler-turnstile/
admin/      assets/      includes/
COPYING     README.md    taler-turnstile.php
There is no build step and no Composer package: the plugin is plain PHP and a
handful of JavaScript files. The QR code library assets/js/qrcode.min.js
is vendored from davidshimjs/qrcodejs and must be present for the QR
code to render; see assets/js/QRCODE-README.md in the plugin directory for
the download instructions if you are building from source.
7.4.2.3. Activating the plugin#
Once the directory is in place, activate the plugin from Plugins → Installed Plugins and press Activate on the GNU Taler Turnstile row:
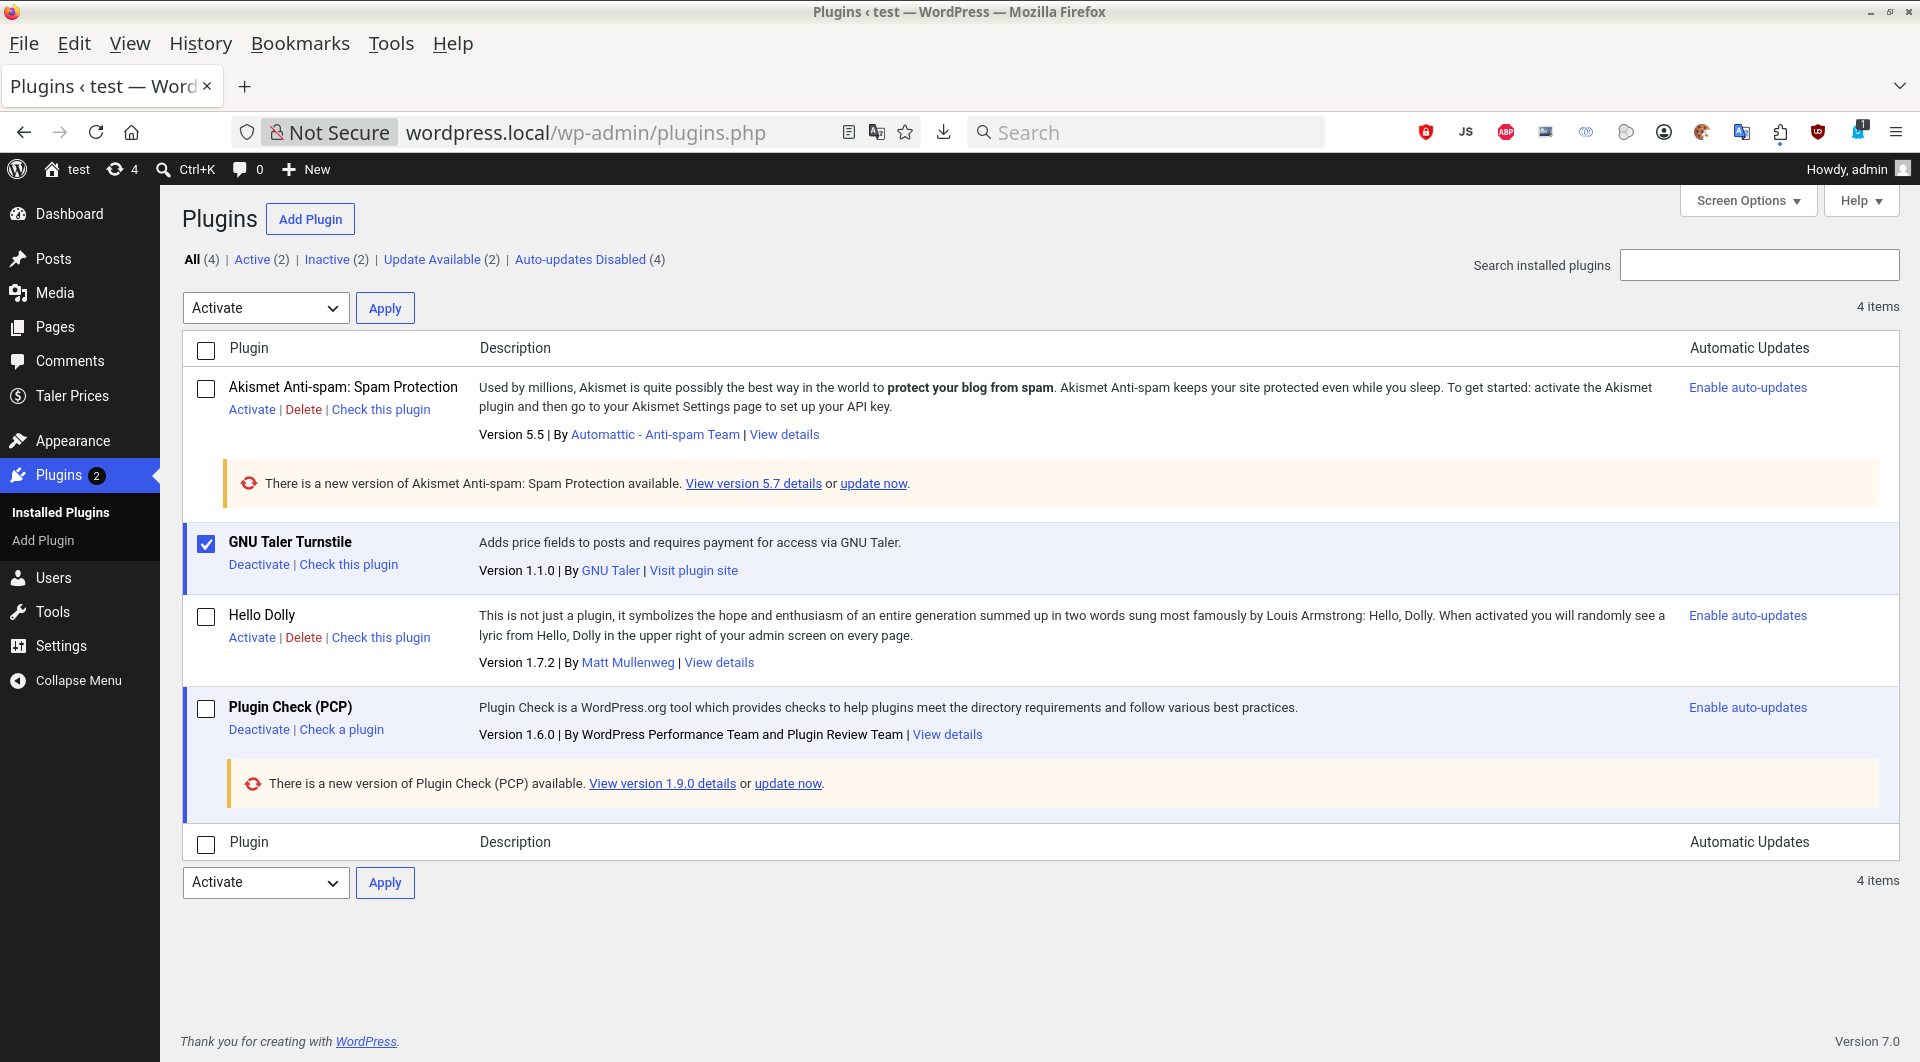
Activation registers the plugin’s options with their defaults
(by default, the post post type is enabled and the backend
URL/token are left blank) and adds three new admin menu entries:
Settings → Taler Turnstile (main settings),
Settings → Taler Subscriptions (subscription purchase prices),
Taler Prices (top-level menu, price-category management).
Deactivating the plugin removes the meta box and stops the paywall from rendering, but it does currently not delete templates already published to the merchant backend; remove those manually if desired (see Templates).
7.4.3. Configuring the basics#
The main settings page lives at
wp-admin/options-general.php?page=taler-turnstile-settings
and is also reachable through Settings → Taler Turnstile. It
collects the four pieces of information Turnstile needs to talk
to the merchant backend and to know which types of content to gate:
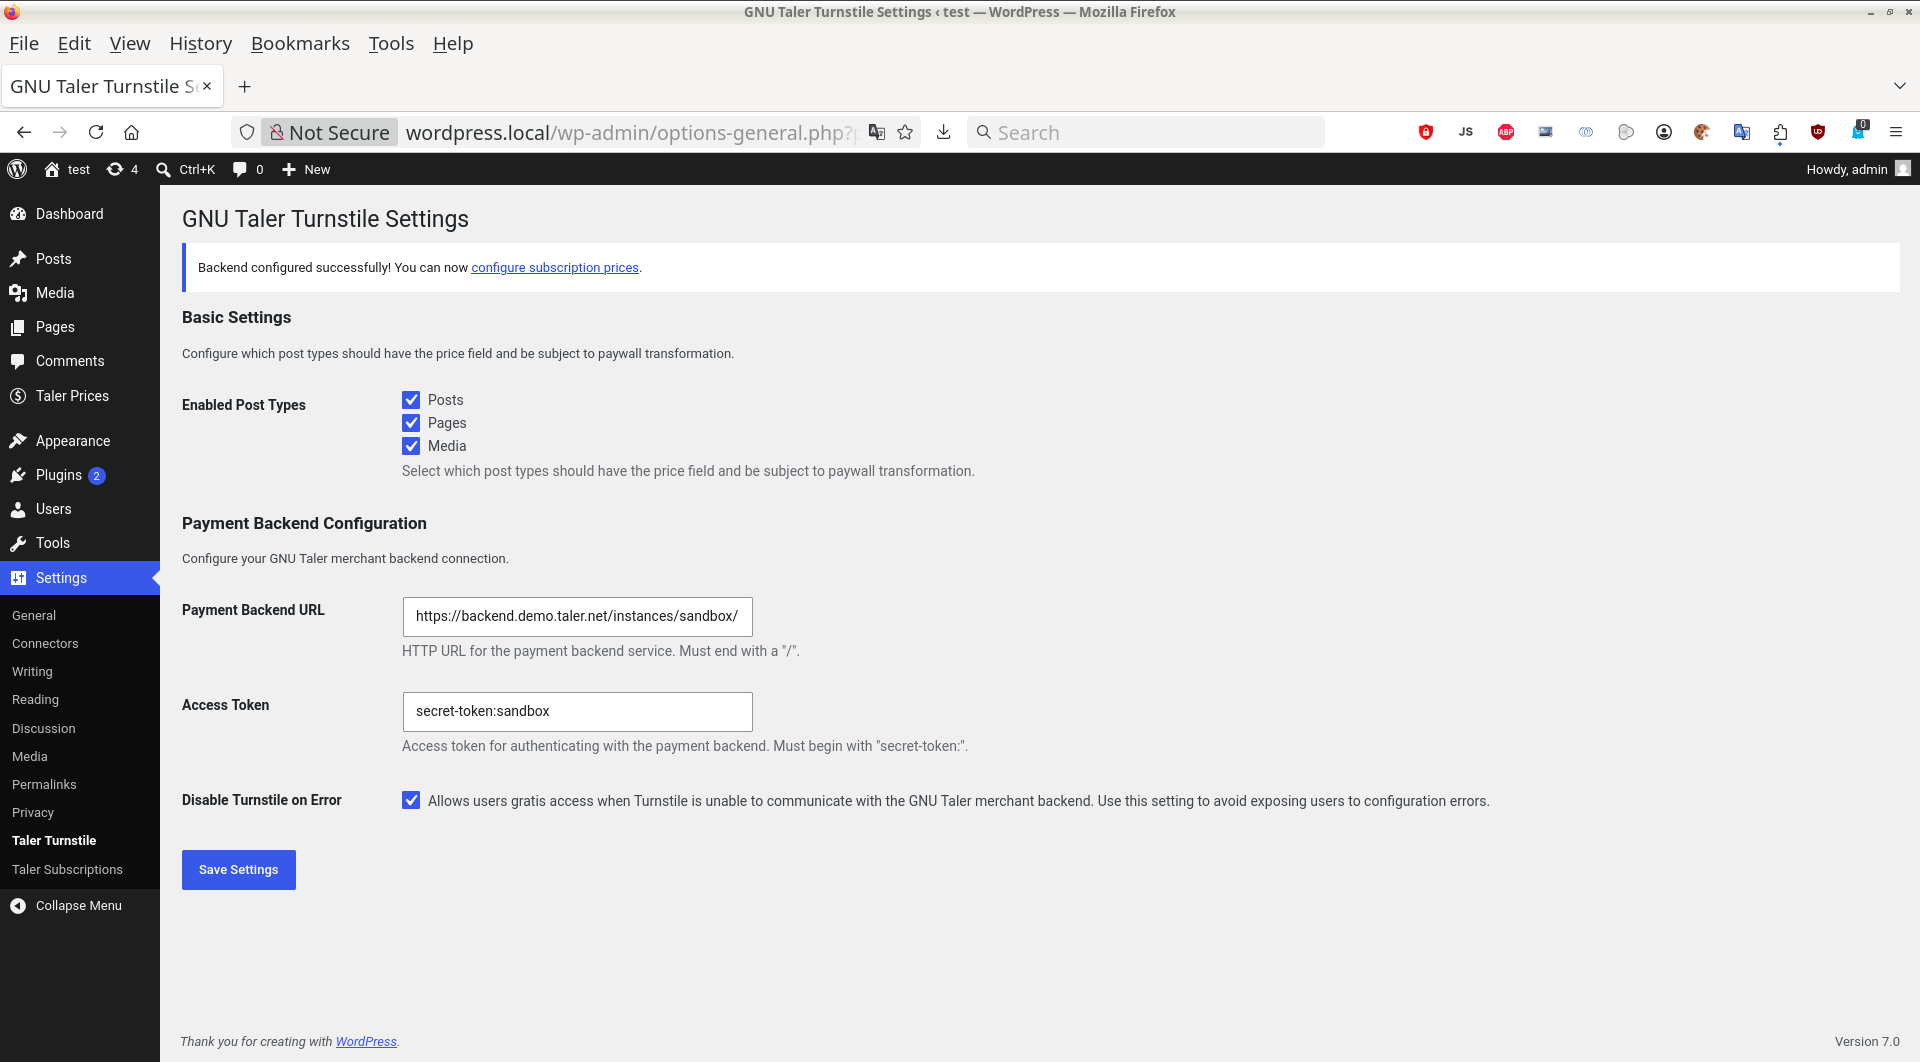
The fields are:
Enabled Post Types — a list of checkboxes derived from every public post type registered on the site (the built-in
postandpage, plus any custom post types). Each ticked post type gains the Taler Turnstile Price Category sidebar meta box on its editor screen, and gets it removed again when unticked. Disabling every post type triggers a one-shot cleanup that drops the_taler_price_categorymeta from every post on the site, so re-enabling a post type later starts from a clean slate.Payment Backend URL — the HTTP(S) base URL of the merchant backend. Instance-specific URLs ending in
/instances/$ID/are accepted; the URL must end with a trailing slash. When you save the form with a non-empty value, Turnstile contacts the backend’s/configendpoint to verify reachability and refuses to save the value if the backend does not respond as ataler-merchantinstance.Access Token — the Bearer token used for every call to the backend. It must begin with
secret-token:(following RFC 8959, see Access control in the merchant manual). When both URL and token are present, the form performs a live authentication check against the backend and surfaces the HTTP status as an admin notice if the access token is wrong (401/403), the instance does not exist (404), or the backend is otherwise unreachable.Disable Turnstile on Error (fail-open toggle, off by default) — when the merchant backend cannot be reached, this controls whether visitors see the unpaywalled article (checked) or an error message in place of the payment widget (unchecked). The settings form warns you with an admin notice if you leave the toggle off while the backend URL or access token is missing, so a misconfiguration cannot silently break the live site.
The first time you save a working backend URL and access token,
Turnstile pushes a paivana-style template to the merchant
backend for every price category that already exists. Each
template carries the ID turnstile-{category_id}. You do not
need to create those templates by hand, and you do not need to
visit the merchant backend’s SPA to manage them — Turnstile keeps
them in sync as you edit the categories (see
Defining price categories below). Saving a new
backend URL or access token also republishes every existing
price-category template, on the assumption that the new instance
does not have them yet.
Before continuing, make sure that the merchant backend instance itself is ready to take payments:
The instance has at least one configured bank account.
Any legitimization required by the chosen payment service provider has been completed.
7.4.4. Configuring subscription prices#
Note
The term subscription is slightly misleading, as it is not auto-renewing. We are in the process of renaming this to passes which is clearer. However, the current plugin uses subscription and thus so does this manual.
Turnstile supports the GNU Taler subscription model, in which a visitor buys a
subscription token once and the token is then consumed to unlock individual
articles for some validity period. The catalogue of available token
families is configured on the merchant backend (see the merchant manual
section on templates and the wider Taler concept of
subscription tokens); Turnstile reads the catalogue live from
private/tokenfamilies and asks you to set the purchase price per token
family per currency.
Navigate to Settings → Taler Subscriptions (URL
wp-admin/admin.php?page=taler-subscription-prices). The page refuses to
render until the backend is configured and reachable — it needs the live
token-family list and a complete currency inventory from /config. When
the backend is ready, the page lists one postbox block per token family
advertised by the backend, with one numeric input per supported currency:
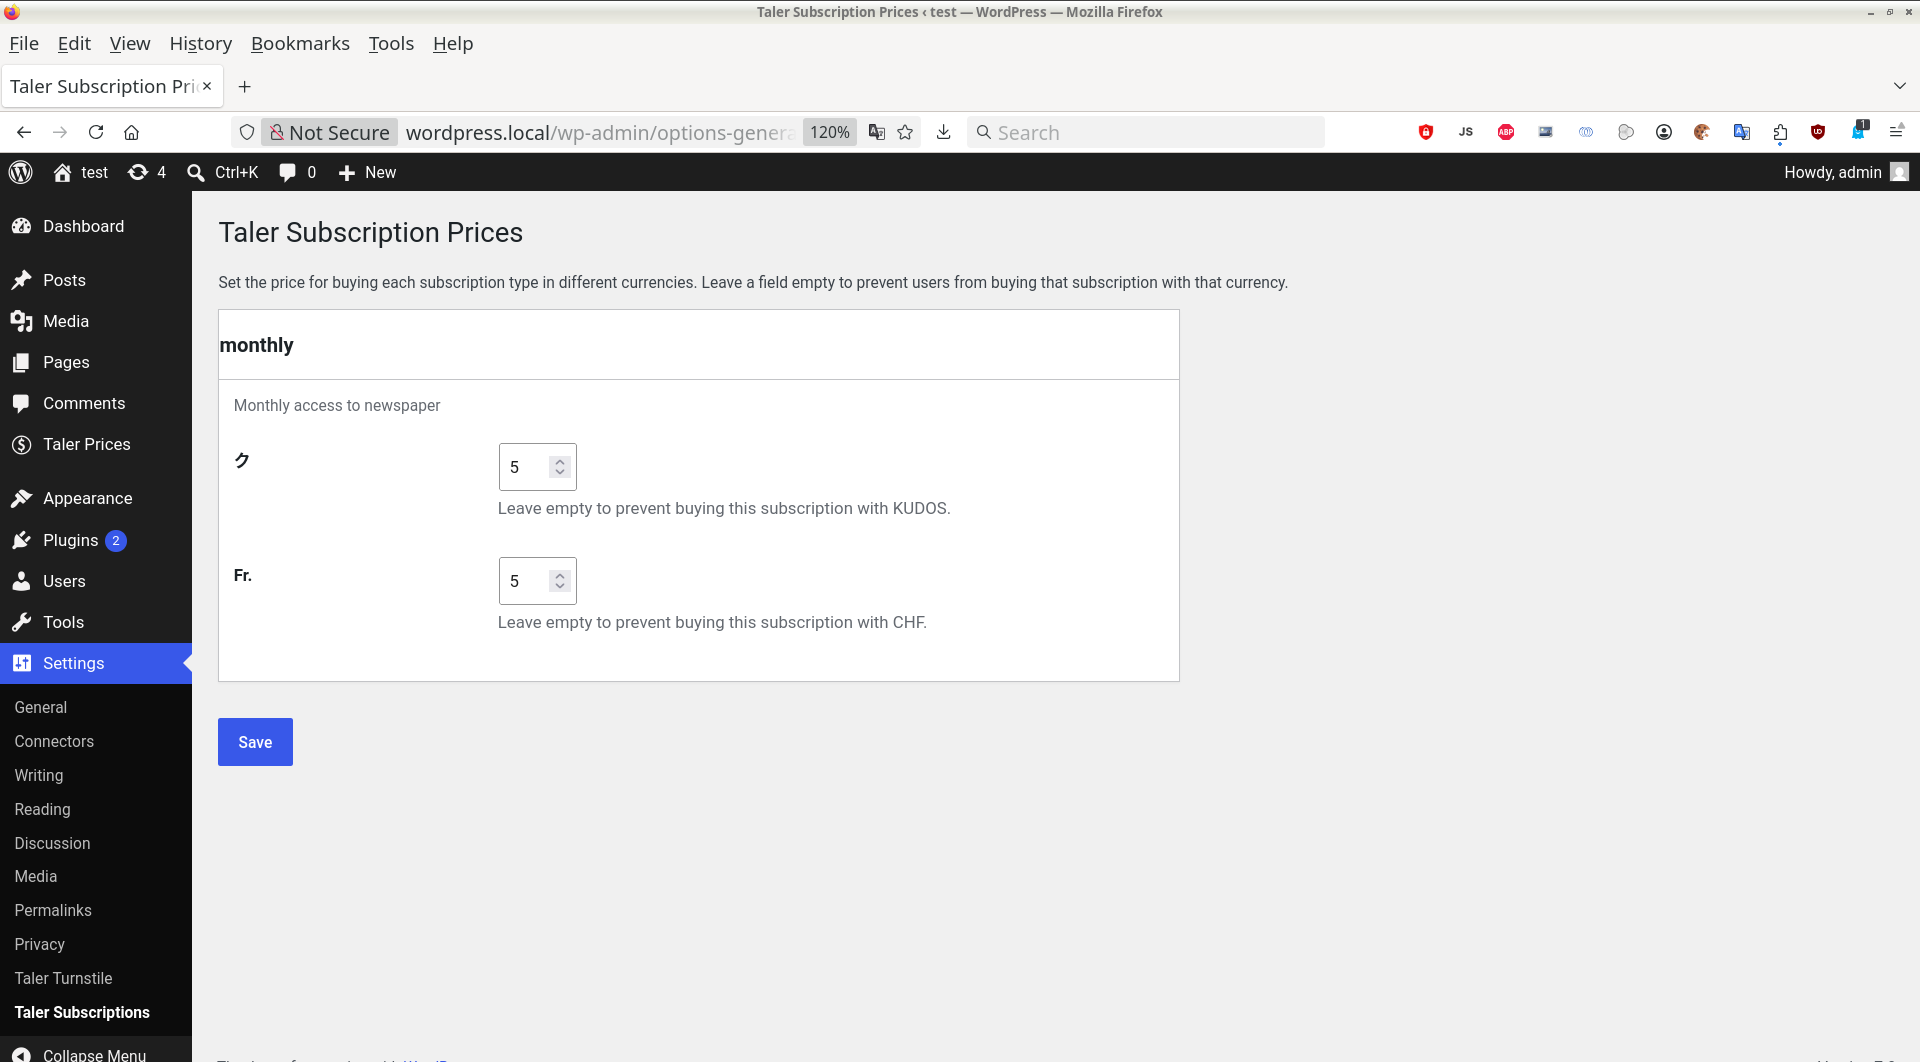
Leaving a field empty disables the Buy subscription in {currency} payment choice for that combination — the subscription will then not be offered for sale in that currency on any article.
If the merchant backend has no token families configured, the page shows a warning and offers nothing to edit. In that case you can still operate Turnstile in pure pay-per-article mode; simply skip this configuration step.
Whenever this page is saved, Turnstile republishes every price-category template against the backend so the new subscription prices appear in the wallet’s Buy subscription choices immediately.
Note
GNU Taler token families offer more flexible payment options, not just subscriptions. However, only subscriptions are supported by Turnstile at this time.
7.4.5. Defining price categories#
A price category is a named set of payment options that can be attached to
posts. Categories are managed under the top-level Taler Prices menu in the
admin sidebar (URL wp-admin/admin.php?page=taler-price-categories). The
list page shows the existing categories together with their descriptions and
offers Edit, Delete and Add New actions:
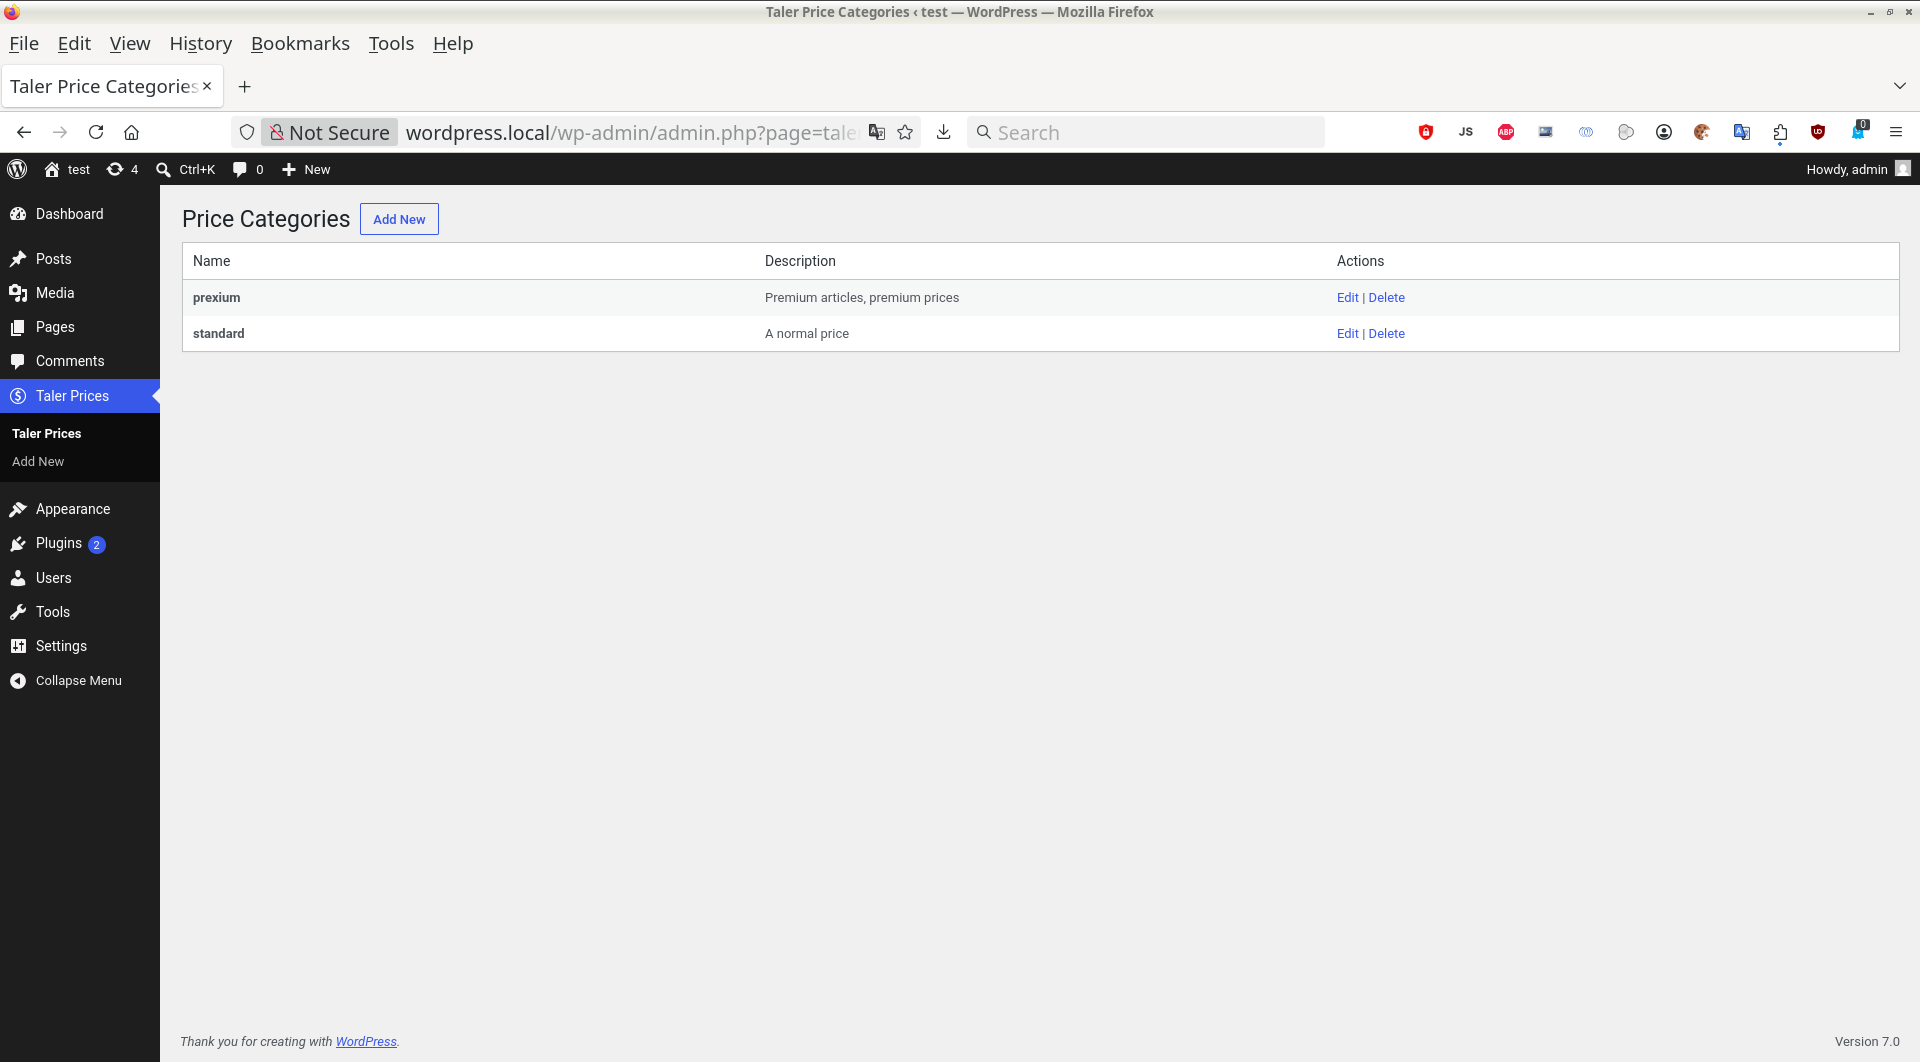
7.4.5.1. Creating or editing a price category#
Click Add New (or Edit on an existing row) to reach the price-category form. The form has two sections:
Name — human-readable label for the category (e.g. Standard article, Long-form feature). Shown to editors when they pick a category on a post-edit screen and used as the merchant template’s summary text.
Description — free text shown to editors and used as the template description on the merchant backend if non-empty.
Below the meta fields, the form has one Prices postbox per known token family, plus a special block labelled No reduction that holds the price for non-subscribers. Each block contains one numeric input per supported currency:
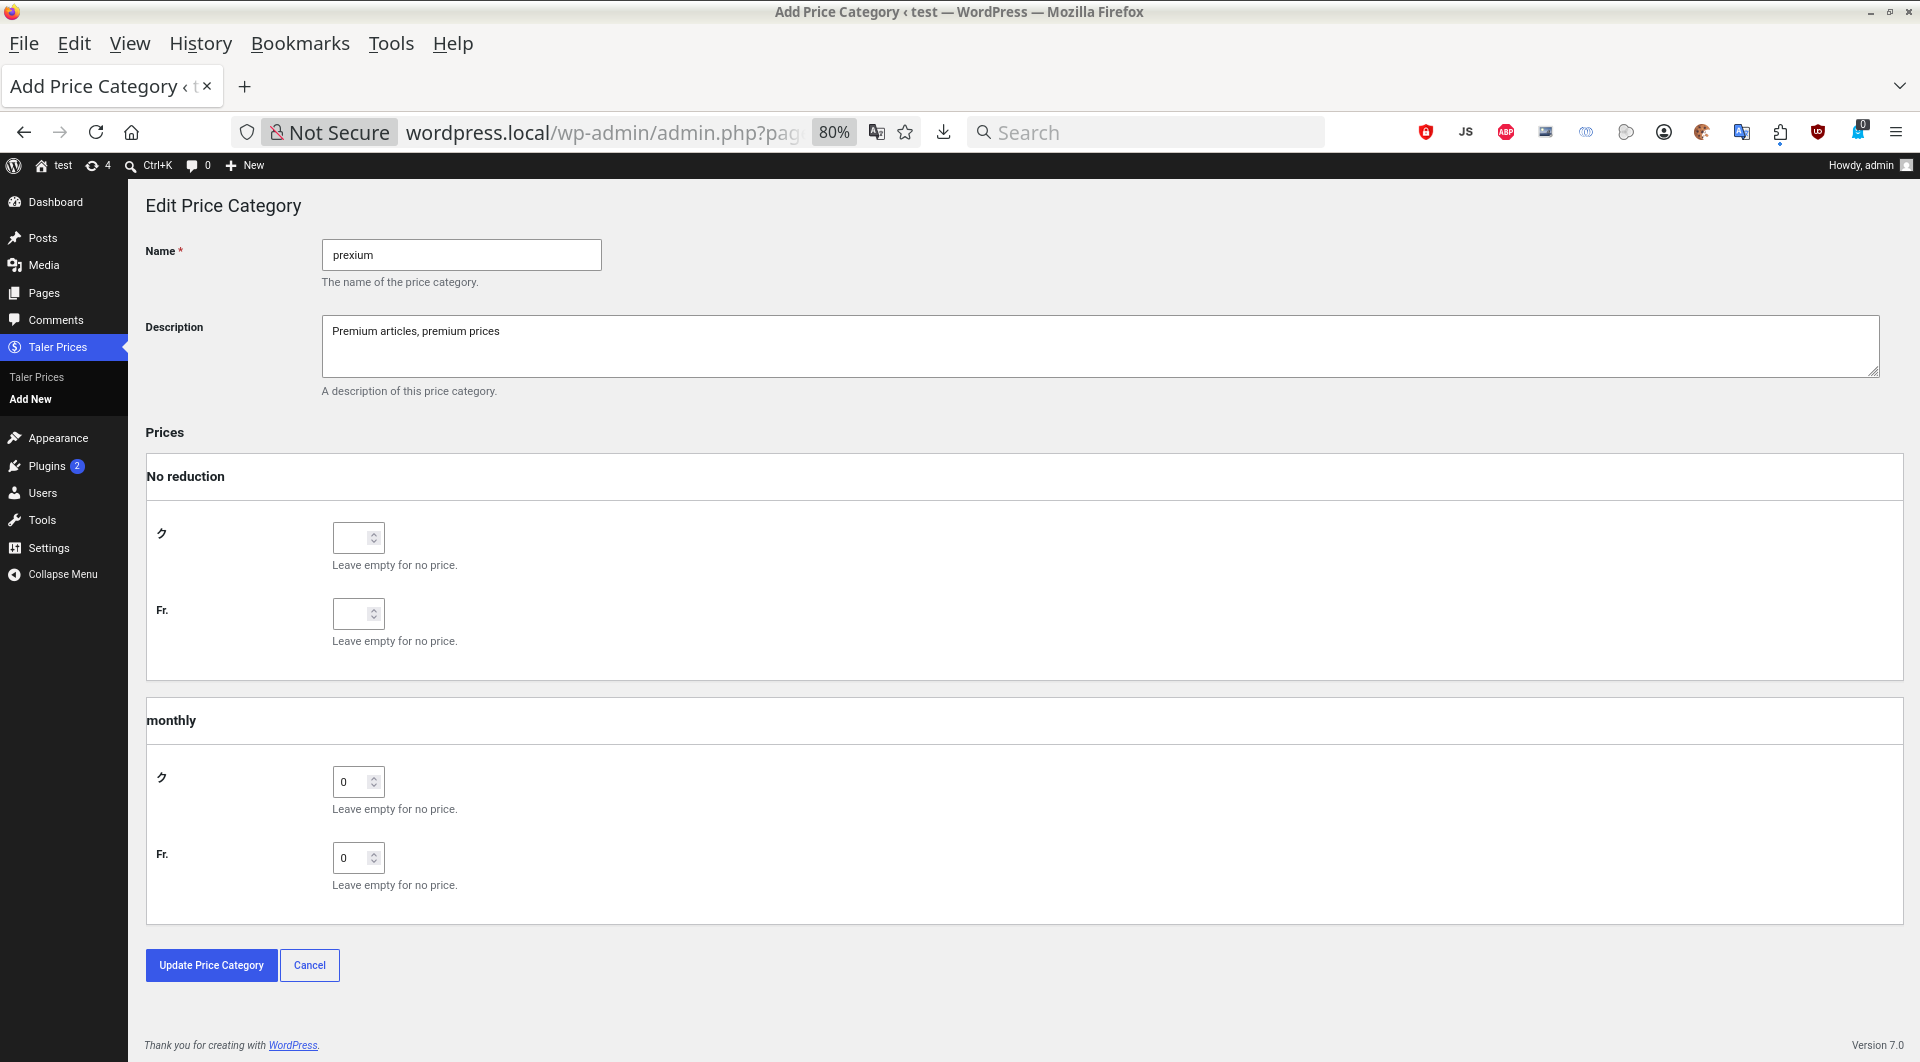
Pricing semantics:
A value in the No reduction block sets the per-article price for visitors without a subscription in that currency. Leave it empty to make the article available only to subscribers in that currency.
A value in a subscription block sets the discounted price for holders of that subscription token in that currency. A value of exactly
0marks the article as fully covered by that subscription — subscribers see it for free. An empty field means “this subscription does not unlock articles of this category in this currency”, so a holder of such a subscription has to pay the full per-article price.
At least one price (across all blocks and currencies) must be set; otherwise the category yields no valid payment choices and the matching template cannot be published.
Saving the form publishes the category as a paivana-style template to the
merchant backend (the v1 choices array is built from the price grid; see
TemplateContractPaivana in the Merchant Backend HTTP API). If the local save succeeds but the backend push fails
(network error, 401, …), the admin notice on the next page surfaces the
error.
Note
In this case, the local price in Wordpress and the merchant template may have drifted out of sync. Visitors would still pay the price in the merchant backend, so this error should always be investigated.
Editing a category or changing prices automatically refreshes the matching
merchant template via PATCH. Deleting a category removes its template via
DELETE; if the delete on the backend fails, you are warned to clean it up
manually.
7.4.6. Gating individual posts#
Once a post type is enabled in the basic settings (see above) and at least one price category exists, every post of that post type gains a new Taler Turnstile Price Category sidebar meta box on its editor screen (shown in the bottom right corner):
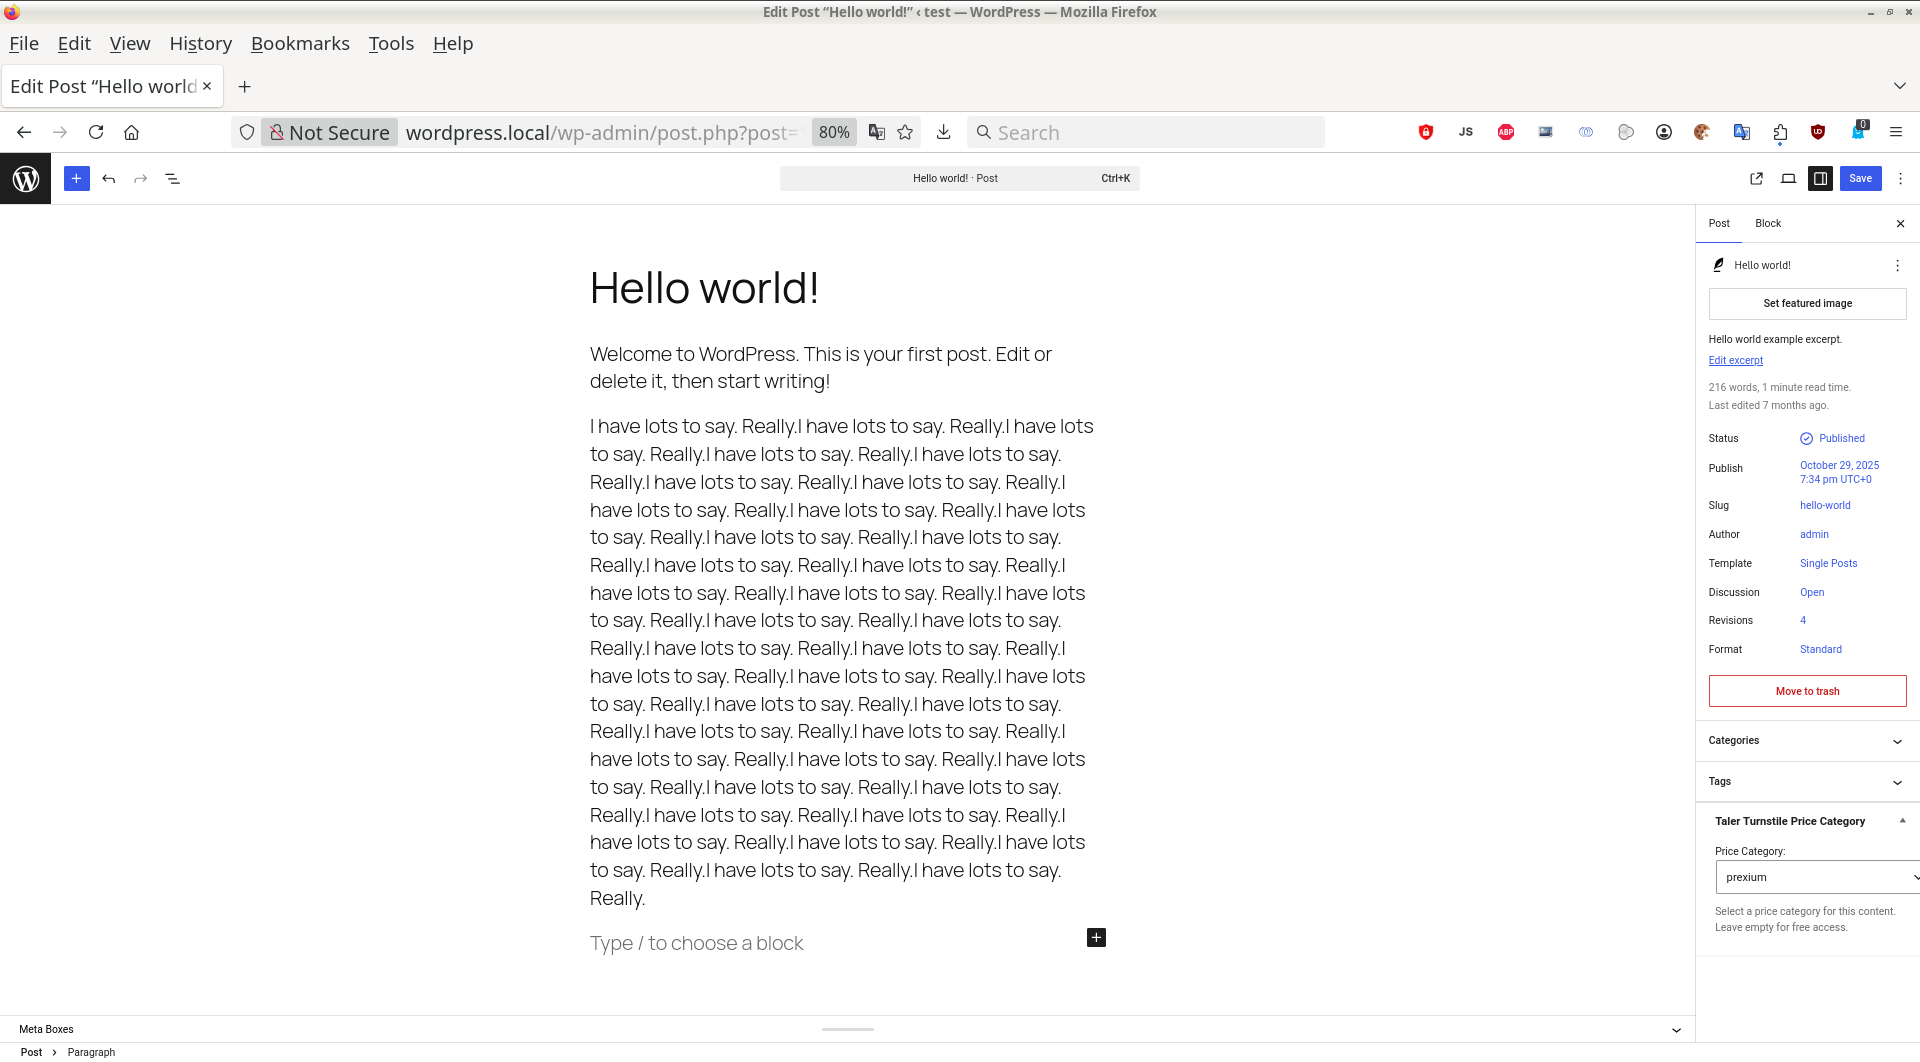
To paywall a post:
Edit or create a post of an enabled post type.
Pick a category in the Price Category drop-down on the sidebar meta box.
Update / Publish the post.
Leaving the drop-down on – None – leaves the post freely accessible — the paywall logic only fires for posts that reference a category.
If you want to remove the paywall from a post, edit it and change the meta box back to – None –. If you want to lift the paywall from an entire post type, untick it in the Enabled Post Types list on the settings page; the meta box and the post meta are then removed from every post of that post type. Re-enabling the post type later starts from a clean slate, forcing you to set the price categories again for all posts of that type.
7.4.7. The visitor experience#
7.4.7.1. Anonymous visitor without a cookie#
For a post that references a price category, an anonymous
visitor without a valid taler_turnstile_paivana cookie sees:
The post rendered as its excerpt (the explicit
excerptfield, or the first 55 words of the body if none is set).A Payment Required block immediately below the excerpt with a QR code (encoding the
taler://pay-template/…URI for the matching merchant template), a Scan with your GNU Taler wallet hint, and — when the browser advertises support for thetalerURI scheme — an Open GNU Taler payment page button.A pricing summary showing the per-article price (or “Not sold individually” if only subscriptions unlock the category) and the list of subscriptions that accept this category.
A Waiting for payment… status line that updates once the wallet picks up the order.
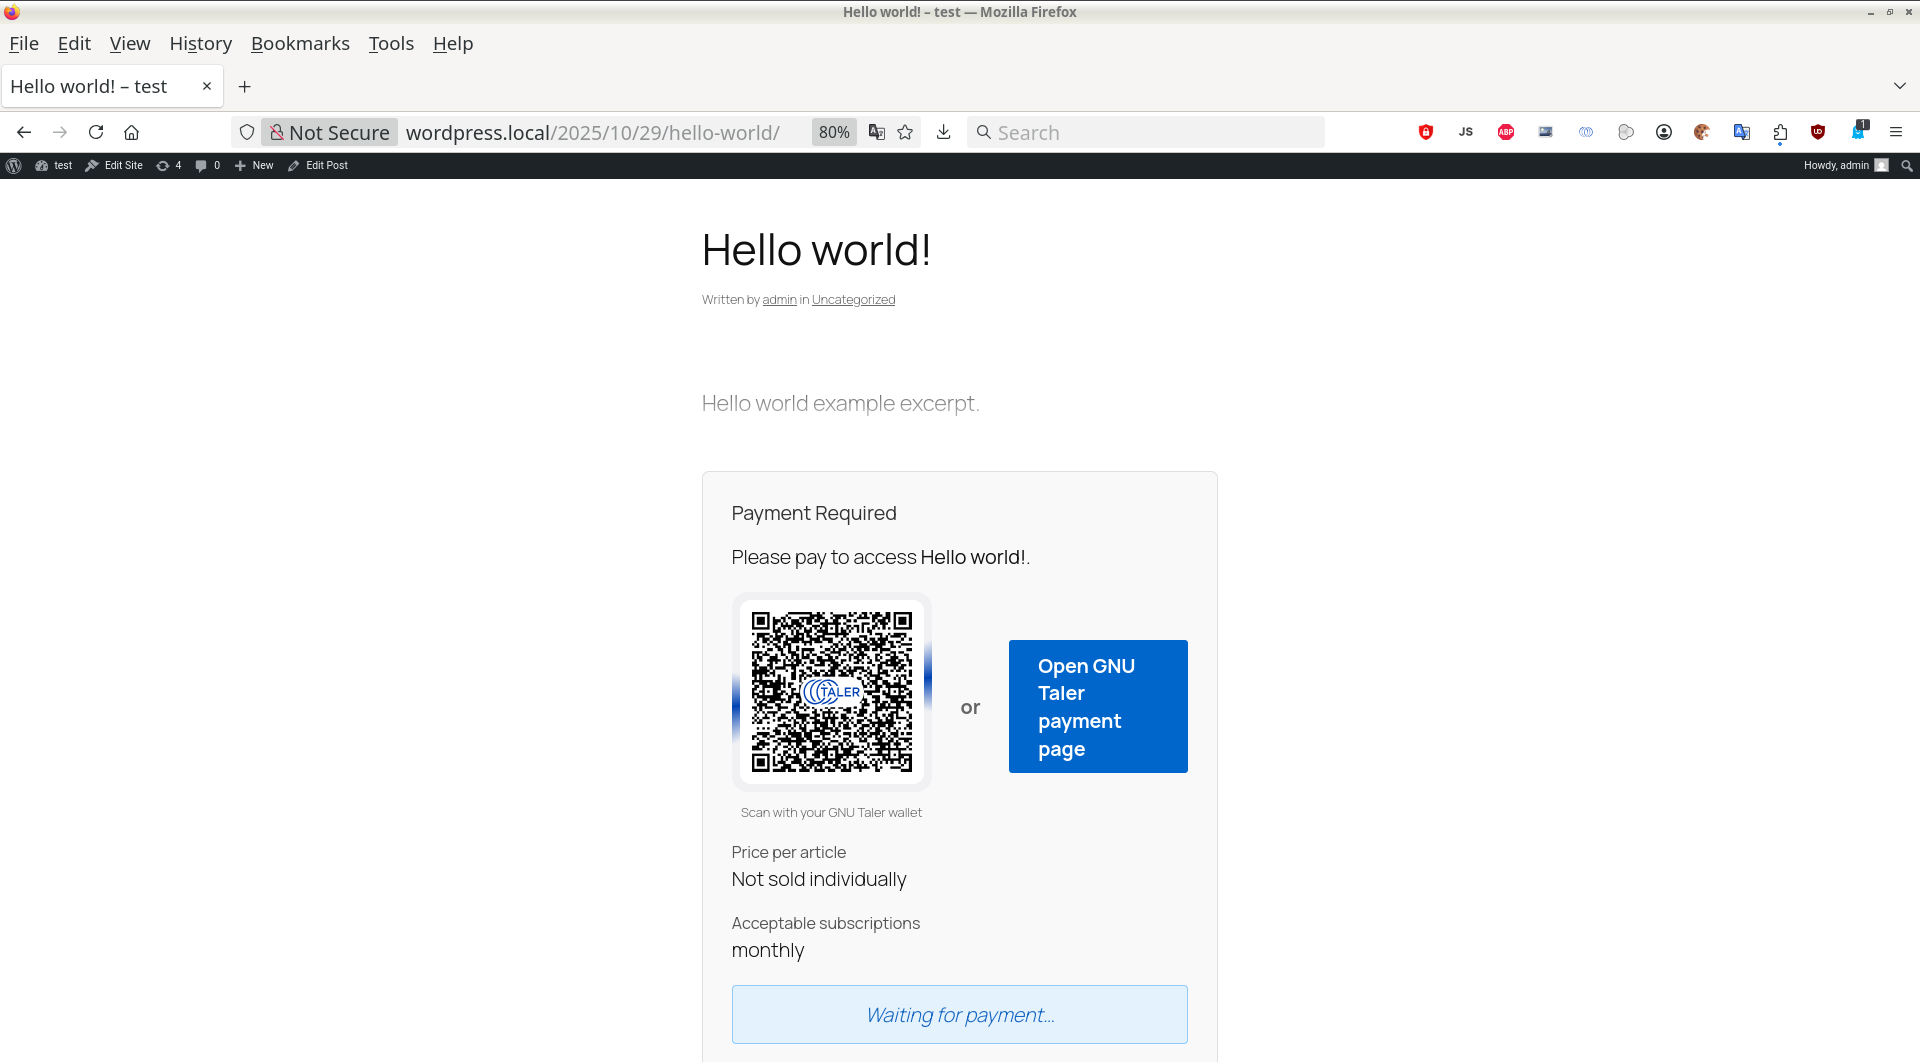
The page is identical for every visitor without the cookie, so Wordpress’ page
cache (and any reverse-proxy cache in front of it) can serve it without
per-request work. The response sets Vary: Cookie so a returning paying
visitor’s path-scoped access cookie still busts the cached paywall, and the
taler://pay-template/… URI is also advertised as a Paivana: HTTP
header for non-JavaScript Taler clients.
Behind the scenes, the JavaScript on the page does not create an order in
the merchant backend. It generates a fresh nonce, derives a session ID from
it (the paivana_id), renders the QR code, and long-polls the public
sessions/{paivana_id} endpoint on the merchant backend waiting for the
wallet to pick the template up and pay. No order, no PHP session and no
database write happens until the visitor’s wallet actually engages with the
template.
7.4.7.2. Paying#
The visitor scans the QR code with a GNU Taler wallet (or clicks the Open GNU Taler payment page button when running a browser with a wallet extension). The wallet shows the available payment choices — for a typical category these are:
Pay in {currency} — the per-article price for non-subscribers.
Pay in {currency} with subscription — only offered to visitors whose wallet holds a matching, unspent subscription token (in which case it usually costs
{currency}:0).Buy subscription in {currency} — pays the per-article price plus the subscription’s purchase price (from Configuring subscription prices above) and yields a fresh subscription token in the visitor’s wallet.
The visitor picks an option, the wallet pays, and Wordpress’ JavaScript proceeds to the confirmation step.
7.4.7.3. Confirmation and unlock#
Once the merchant backend reports the order as paid, the JavaScript POSTs
{order_id, nonce, cur_time, website} to the plugin’s REST endpoint at
/wp-json/taler-turnstile/v1/paivana. The Wordpress-side controller
re-derives the canonical paivana_id, resolves the fulfillment URL back to
a local post via url_to_postid(), fetches the order from the merchant
backend and verifies that the paid contract’s ``fulfillment_url`` matches
the requesting page and that the paid amount is one of the amounts the price
category accepts. Only then does it mint the taler_turnstile_paivana
cookie and instruct the browser to reload the article.
Note
The field named cur_time here is not a current time: it is the
expiration of the access being bought, which is why it is also one of
the inputs hashed into the paivana_id. paivana-httpd and
DD 76 have renamed it to
expiration for exactly that reason. TODO: rename it here too, in
the plugin’s JavaScript and REST controller and then in this manual;
until the plugin changes, this document deliberately keeps the old name
so that it matches the code that is shipped.
The cookie is keyed on Wordpress’ built-in wp_salt('auth'), bound to the
visitor’s REMOTE_ADDR and Path-scoped to the specific fulfillment URL,
marked HttpOnly, SameSite=Lax, and Secure when the page was served
over HTTPS. It is valid for 24 hours (the ORDER_VALIDITY_SECONDS constant
in Taler_Merchant_API; this will follow the merchant-supplied
pay_deadline/max_pickup_time in the future). The cookie covers
exactly one fulfillment URL — clearing cookies forgets paid access, and access
to a different paywalled article requires a fresh payment (or a valid
subscription).
The REST confirmation endpoint is unauthenticated by design (the payer has no Wordpress account) and is therefore rate-limited per-IP to at most 30 requests per minute, comfortably above legitimate use but capping the abuse of an endpoint that triggers a merchant-backend round-trip per call.
Note
ORDER_VALIDITY_SECONDS should probably be made
configurable in the future, as should the restriction of the
client to a particular IP address, as that may or may not be
desired. See #11444.
7.4.7.4. Subscriptions in action#
When a paid contract bought a subscription token, Turnstile also stores the token family slug and the token’s expiration time in the visitor’s PHP session (the session is started only after the successful payment, so the cacheable pre-payment path is unaffected). Subsequent requests to other posts whose price category is fully covered by the same subscription short-circuit the paywall entirely: the visitor never sees the Payment Required block again until the token expires.
Visitors without a PHP-session cookie still see the paywall page (so anonymous, cache-friendly traffic stays cacheable); the subscriber check is gated on the session cookie already being present so that loading a paywalled post never creates a session on its own.
7.4.8. Operational notes#
7.4.8.1. Caching#
The plugin emits cache-control headers tuned for the two paths it produces:
The static paywall response carries
Vary: Cookie, so a shared cache (page cache plugin, reverse proxy, CDN) can store one copy for all anonymous visitors while still busting it for returning paying visitors whose path-scopedtaler_turnstile_paivanacookie now accompanies their request.The post-payment response (the article, served only to the visitor who paid) is marked
Cache-Control: private,
no-store
and triggers theDONOTCACHEPAGEdefine plusnocache_headers()so it never lands in a shared cache.The REST confirmation endpoint under
/wp-json/is not page-cached by Wordpress, and its response is explicitly markedno-store.
A reverse-proxy cache in front of Wordpress must therefore honour the Vary:
Cookie header to avoid handing one paying visitor’s full-content response to
another visitor.
7.4.8.2. Logging#
The plugin writes to PHP’s error_log (i.e. the destination your
php.ini or web server configures for error_log). Notable events that
are logged include unreachable backends, malformed responses from the merchant
backend, paid orders whose contract does not match the fulfillment URL or
whose paid amount falls outside the price category, and template
create/update/delete failures. When debugging an integration problem, tailing
the PHP error log while reproducing the issue is usually the fastest way to
identify the culprit.
7.4.8.3. Permissions#
All admin pages — the basic settings, the subscription prices and the
price-category CRUD — are gated on Wordpress’ manage_options capability,
which corresponds to the Administrator role. Editors who only need to
assign a price category to a post do not need manage_options: the sidebar
meta box is rendered for any user who can edit the post in question
(edit_post capability check on the meta field).
7.4.8.4. Hooks and filters#
The plugin exposes a small number of WordPress filters so a theme or site-specific plugin can adapt Turnstile to local conventions without forking it:
taler_turnstile_enabled_post_types— alter the list of post types subject to the paywall transformation.taler_turnstile_payment_choices— modify the paymentchoicesarray before it is sent to the merchant backend.taler_turnstile_currencies— add to or modify the list of currencies discovered from the backend’s/config.
These hooks are intentionally narrow; deeper customisation (for example,
overriding the paywall HTML) requires patching
Taler_Content_Filter::render_paywall() directly.